How to Measure Chainsaw Chain Length (And Avoid Mistakes)
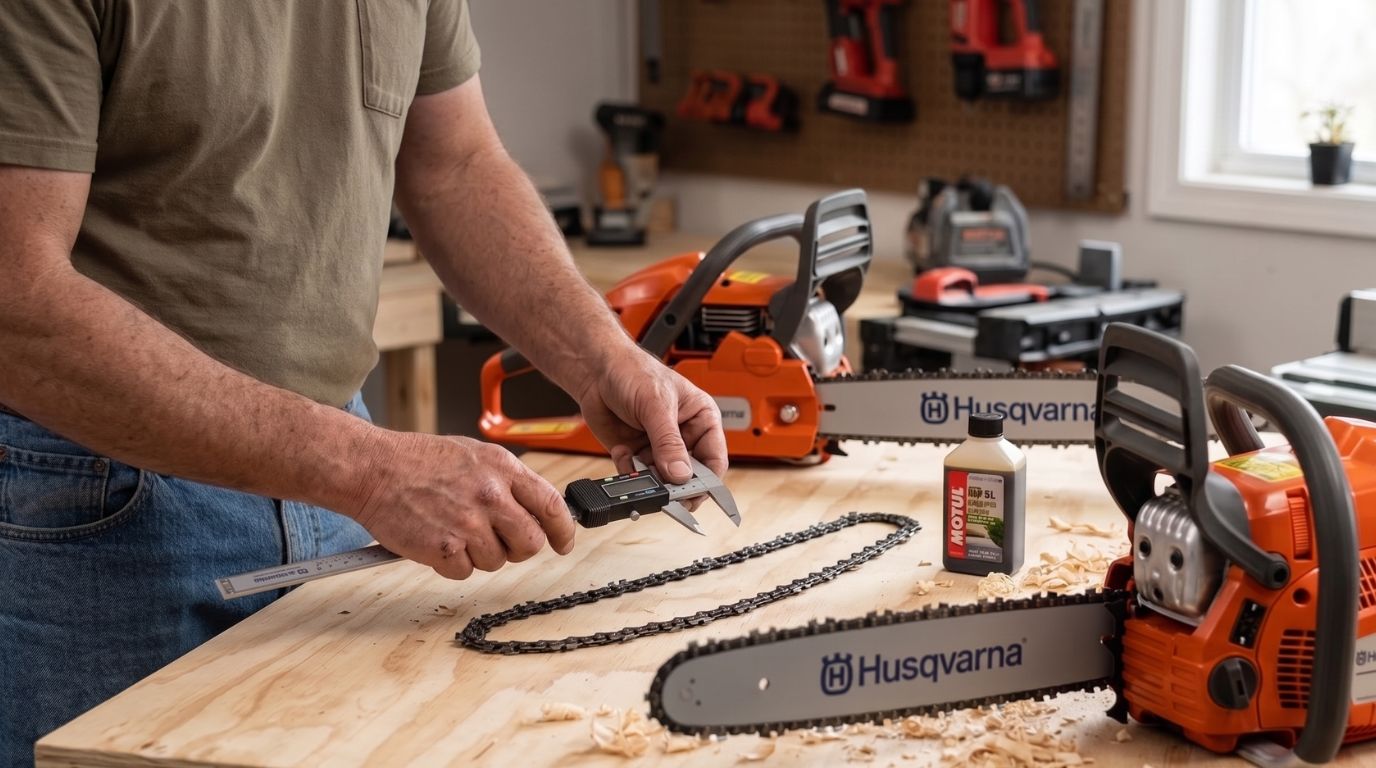
I remember staring at the wall of chainsaw chains at my local hardware store, completely lost. I had my dull, dirty chain sitting in a plastic bag. I honestly thought I could just hold it up to a new box to find a match. That was my first big mistake, and it cost me a second trip to the store. If you need to know how to measure chainsaw chain length, you are in the perfect place.
I quickly learned that guessing simply does not work with chainsaws. Getting the wrong size is frustrating. It wastes your money. Worse, using the wrong chain size is incredibly dangerous. In this guide, I will show you exactly how to find the right numbers. You will learn the exact steps to figure out your chain size without the usual headache.
Why Finding the Right Size Feels Confusing at First
Most people assume chain length is just a single measurement in inches. It makes sense, right? If you have an 18-inch bar, you just buy an 18-inch chain.
Sadly, it is not that simple. Chainsaw chains are actually measured using three specific numbers. If even one of these numbers is wrong, the chain will not fit your saw. It might not fit in the groove. It might not wrap around the gear properly. I learned this the hard way after jamming a brand-new chain into a bar that was too narrow for it.
The Three Crucial Numbers You Need
Before we look at the physical chain, you need to understand what we are actually looking for. Every single chainsaw chain is defined by these three measurements.
Pitch: The Spacing of the Links
Pitch is the distance between the links on the chain. It tells you how close together the drive parts are. If the pitch on the chain does not match the pitch on your saw’s driving gear (the sprocket), the chain will skip.
Gauge: The Thickness of the Bottom Link
Gauge is the thickness of the part of the chain that slides into the guide bar. This groove is very narrow. If your chain gauge is too thick, it gets stuck. If the gauge is too thin, the chain will flop from side to side. A wobbly chain cuts terribly and can slip right off the bar.
Drive Links: The True Length
This is the most important part of figuring out how to measure chainsaw chain length. You do not measure a chain with a tape measure. You measure it by counting the drive links. These are the pointy pieces of metal on the bottom of the chain that look like shark fins.
| Measurement Type | What It Actually Is | Why It Matters For You |
| Pitch | Distance between rivets | Must match the saw’s sprocket gear |
| Gauge | Thickness of the bottom links | Must fit snugly in the bar groove |
| Drive Links | Total number of bottom links | Determines the actual loop length |
How to Measure Chainsaw Chain Length (The Easy Way)
Before you start counting anything manually, there is a much easier way to find your chain size. The manufacturer usually prints the answers right on the saw.
Look at the Guide Bar
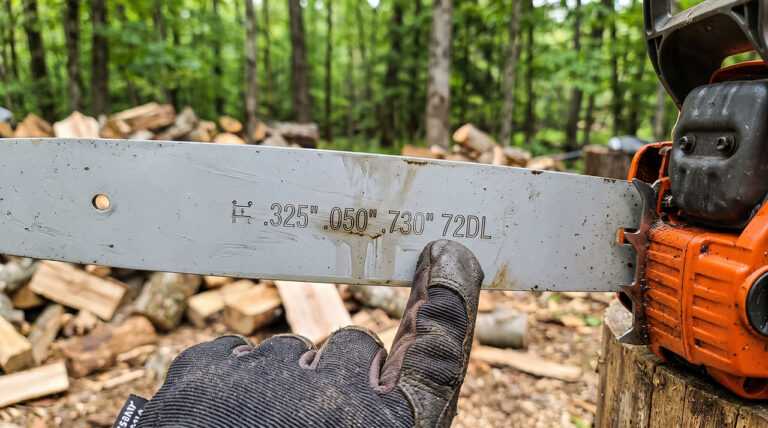
The guide bar is the long metal blade that the chain spins around. Almost all good chainsaws have the measurements stamped right into the metal of this bar. You just have to know where to look.
Check the heel of the bar. This is the wide part of the metal blade right where it bolts onto the plastic engine housing. You will often see a bunch of numbers stamped or laser-etched here.
Decoding the Stamped Numbers
These numbers can be hard to see. Over time, the bar gets covered in sticky tree sap, bar oil, and packed sawdust. Grab a stiff brush and a rag. Scrub the base of the bar until you can read the metal.
You are looking for three specific things. You will usually see a number like 3/8, a decimal like .050, and a whole number followed by DL or E. That is your pitch, gauge, and drive link count. If you find this stamp, your work is done. Write those numbers down and go to the store.
| Bar Location | What to Look For | Example Stamp |
| Base of the bar | Pitch | 3/8 or .325 |
| Next to Pitch | Gauge | .043 or .050 |
| Near Gauge | Drive Links | 72 DL or 72E |
How to Measure Chainsaw Chain Length (The Manual Way)
Sometimes, the easy way fails. Old guide bars lose their stamped markings. The paint wears off. The metal gets scratched deeply from years of cutting wood. When this happens, you have to measure the old chain yourself.
Finding the Pitch Manually
Measuring pitch yourself is tricky but entirely possible. Pitch is technically defined as the distance between any three consecutive rivets, divided by two. Rivets are the little round metal dots holding the chain together.
Grab a ruler. Measure the distance from the center of the first rivet to the center of the third rivet. Take that measurement in inches and divide it in half. For example, if the distance is 3/4 of an inch, dividing it by two gives you 3/8. Your pitch is 3/8.
Finding the Gauge Manually
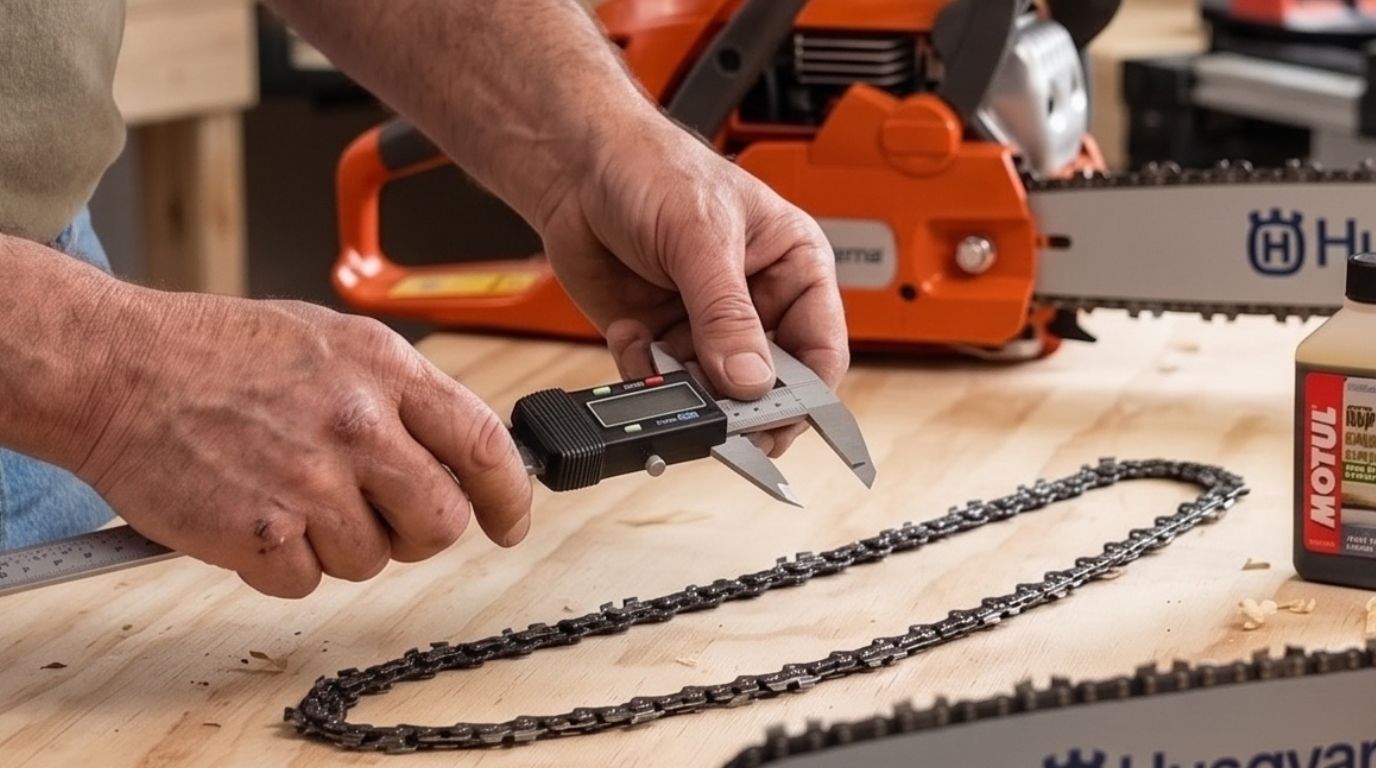
I will be honest with you. Finding the gauge manually is incredibly hard. The differences between gauge sizes are tiny fractions of an inch. We are talking about the difference between .050 inches and .058 inches.
You cannot measure this with a standard tape measure. You need a tool called digital calipers. You clamp the calipers onto one of the drive links (the bottom shark fins) to get the exact thickness. If you do not own calipers, take the old chain to a hardware store. They usually have a slot-testing tool hanging on the wall to check the gauge for you.
| Common Gauge Sizes | Decimal Equivalent | Can You Measure by Eye? |
| 0.043″ | 1.1 mm | No, requires calipers |
| 0.050″ | 1.3 mm | No, requires calipers |
| 0.058″ | 1.5 mm | No, requires calipers |
| 0.063″ | 1.6 mm | No, requires calipers |
Counting the Drive Links Manually
This is the most crucial step when learning how to measure chainsaw chain length. The drive link count is the only way to get a chain that tightens properly around your bar.
Take your old chain off the saw. Lay it out flat on a table or workbench. Do not count the cutting teeth on the top. The cutting teeth are spaced irregularly. You must count the drive links on the inside circle of the chain.
Counting the Links Without Losing Your Mind
It is very easy to lose your place when counting metal links. I used to count to forty, get distracted, and have to start all over. Now, I use a simple trick.
Take a bright piece of masking tape. Wrap it around one single drive link. Or, mark one link with a permanent marker. This is your starting point. Now, start counting the links moving away from your mark. I like to count by twos. Once you hit your marked link again, you have your exact drive link count.
| Common Mistakes | A Better Approach |
| Counting cutting teeth | Only count the bottom drive links |
| Measuring with a tape measure | Ignore length in inches entirely |
| Losing count halfway through | Mark the first link with bright tape |
Bar Length vs. Chain Length: A Common Trap
This is the biggest point of confusion for beginners. I certainly fell for it. Let’s clear up the difference between bar length and chain length. They are not the same thing.
What Bar Length Actually Means
When you buy a chainsaw, the box proudly says “16-inch bar” or “20-inch bar.” This number refers to the cutting length of the saw. It tells you how thick of a log you can cut in a single pass.
It is the measurement from the front of the plastic engine body to the very tip of the metal bar. It is a helpful number to know for buying wood-cutting equipment, but it tells you almost nothing about the chain itself.
Why Chain Length is Different
The chain has to wrap all the way around the top of that bar, go around the nose, come all the way back down the bottom, and wrap around the engine gear.
Therefore, a chain on a 16-inch bar is much longer than 16 inches. This is why learning how to measure chainsaw chain length means counting drive links, not measuring inches. Never buy a chain just because the box says “Fits 16-inch bars.” There are many different 16-inch bars with entirely different pitches and gauges.
| Term | What It Means | Real Example |
| Bar Length (Called Size) | Cutting capacity in inches | 18-inch bar |
| Physical Bar Length | The actual metal part | Usually 20+ inches |
| Chain Length | Total loop size | 72 Drive Links |
Mistakes I Made When Replacing Chains
I have made my fair share of errors while maintaining my chainsaws. Sharing my mistakes might save you some time, money, and frustration.
Buying the Wrong Pitch
Once, I found a great deal on a three-pack of chains online. I counted my drive links and the gauge matched. I ignored the pitch. When they arrived, I put one on my saw.
As soon as I started cutting, the saw vibrated violently. The chain got stuck. The pitch of the new chain was larger than the pitch of my saw’s drive sprocket. The links were literally skipping over the gear teeth. I ruined the sprocket and had to buy replacement parts. Always match the pitch.
Ignoring Chain Stretch
Chainsaw chains are made of metal. When metal gets hot and pulls under heavy tension, it stretches. Over time, your chain gets longer.
If your old chain is heavily stretched, counting the drive links still works. The number of links never changes. However, if you try to hold a brand new chain next to an old stretched chain, they will look like different sizes. The old one will look longer. Do not panic. As long as the drive link count is identical, the new chain is correct.
Real-World Troubleshooting Guide
Sometimes you have all the right numbers, but things still feel wrong when you put the new chain on the saw. Here are a few things I check when this happens.
The Chain Won’t Go On the Bar
If you bought the correct drive link count, but the chain feels too tight to slip over the nose of the bar, check your tensioner.
The tension screw moves the bar forward and backward. If you left the tensioner adjusted for your old, stretched chain, the bar is pushed too far forward. A new, unstretched chain will never fit. You must loosen the tension screw all the way to bring the bar backward. Then, the new chain will slide on easily.
The Chain Doesn’t Fit in the Groove
If the chain refuses to drop into the track of the guide bar, you bought the wrong gauge. It is that simple.
Even a tiny difference matters. If your bar is designed for a .043 gauge chain, and you bought a .050 gauge chain, it will not fit. You cannot force it. You cannot file it down. You simply have to return the chain and get the right one.
| Issue | Likely Cause | Solution |
| Chain skips and jumps | Wrong pitch size | Check bar stamp for correct pitch |
| Chain won’t enter bar groove | Gauge is too thick | Buy chain with smaller gauge |
| New chain won’t reach over bar | Tensioner not reset | Loosen tension screw fully |
| Chain flops loosely in groove | Gauge is too thin | Buy chain with thicker gauge |
How to Read Chainsaw Chain Boxes
When you finally get to the store, the boxes can still look intimidating. Every brand uses different colors and coding systems. Do not let the marketing terms confuse you.
Look strictly for the three numbers we discussed. You will usually find them printed on the bottom corner of the front label. It will look something like this: 3/8″ LP | .050″ | 56 DL. If those numbers perfectly match what you measured or found stamped on your bar, you have a winner. Ignore whatever brand of saw the box claims to fit. The numbers are the only truth.
Final Thoughts
Learning how to measure chainsaw chain length feels like learning a new language at first. I certainly felt overwhelmed the first time I had to replace mine. But once you understand the simple concepts of pitch, gauge, and drive links, it all makes perfect sense.
The biggest lesson I can share is to trust the drive link count above all else. Ignore the tape measure. Check the metal stamp on your guide bar first. If you have to count manually, use a piece of tape so you do not lose your place. Take your time, get the right numbers, and your saw will run smoothly and safely every single time.