How Tight Should a Chainsaw Chain Be? A Practical Guide
I still remember the first cord of oak firewood I ever bucked on my own. Ten minutes into the job, blue smoke rolled off the guide bar, and the engine sounded like it was pulling a loaded truck up a mountain. I had cranked down the tensioner screw thinking tighter meant safer. In reality, I had turned my bar into a high-friction brake pad that nearly cooked the motor.
Learning how tight should a chainsaw chain be is one of those lessons that saves you money, saves your gear, and keeps your fingers safe. When chain tension is dialed in, the saw pulls smoothly through timber with minimal pressure from your hands. In this guide, I will share the simple physical checks I rely on every time I work, how to handle hot versus cold metal, and the exact steps to keep your saw cutting clean.
The Snap Test: How Tight Should a Chainsaw Chain Be in Practice?
Getting your chain tension right does not require calipers or specialized measuring tools. You only need a pair of heavy leather gloves and a couple of seconds to run what loggers call the snap test.
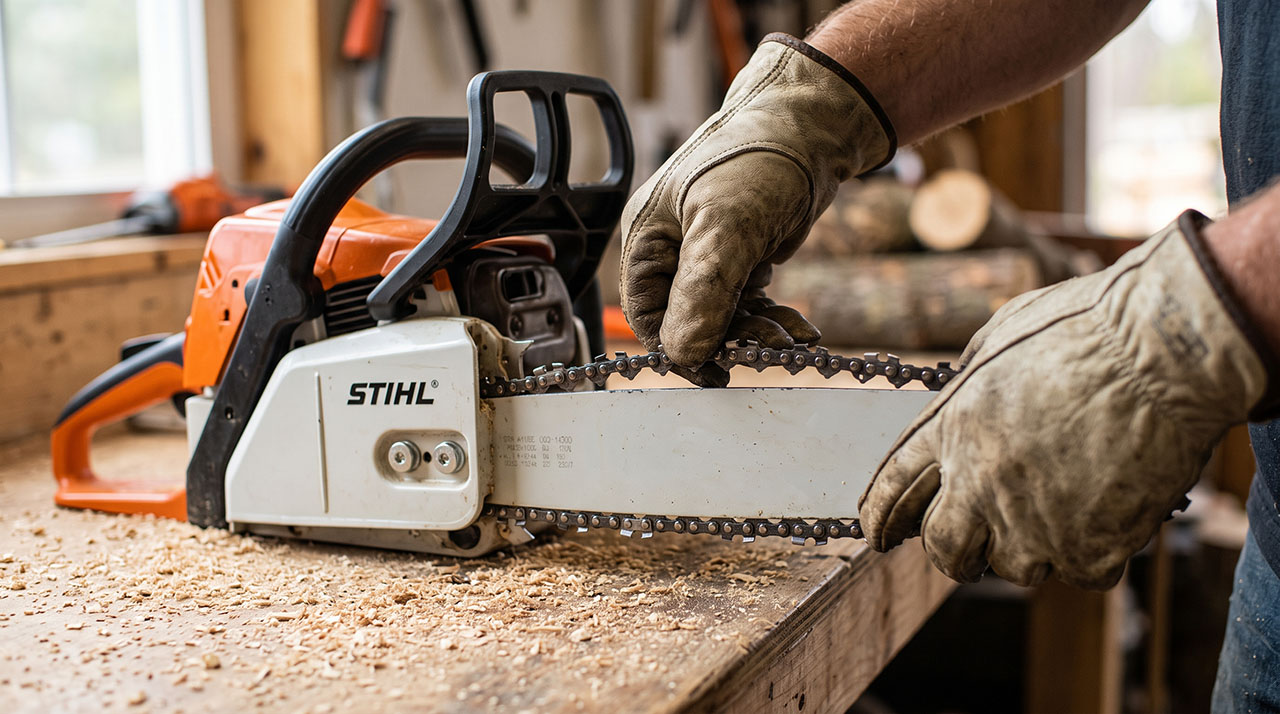
The snap test is the gold standard for quick field checks. With the engine stopped, grab the chain along the top edge of the guide bar and pull it upward with moderate force. A properly adjusted chain will lift just enough to expose the bottom tips of the drive links, but the link points will remain nestled inside the bar groove. When you let go, the chain should snap cleanly back against the bar rails with a solid, satisfying click.
Checking the Drive Links and Sag
Look closely at the underside of your bar when your saw rests on a flat surface. Gravity always reveals loose chain issues on the bottom track first.
There should be zero gap between the tie straps and the lower bar rail. If you see any daylight between the chain and the bottom of the bar, your chain is already too loose. However, the drive links—the small shark-fin shaped teeth on the underside of the chain—must sit fully within the guide groove. If you pull the chain up and the bottom tips of those links pop entirely out onto the bar flat, you have slack that needs clearing immediately.
Pulling the Chain Freely by Hand
A chain can pass the snap test and still cause trouble if it binds inside the bar rail. The second half of the check tests rotational resistance.
Put on your gloves, make sure your chain brake is fully released, and pull the chain forward along the top of the bar. It should slide smoothly with steady hand pressure. You will feel light resistance from the drive sprocket, but it should never hitch, grind, or require two hands to budge. If moving the chain by hand feels like dragging an anchor through gravel, your chain is too tight.
| Check Method | Visual and Tactile Clue | What It Means |
| The Snap Test | Snaps back firmly against the rail | Tension is in the sweet spot |
| Bottom Sag Check | Links droop below the bottom rail | Chain is dangerously loose |
| Free-Spin Pull | Chain moves smoothly with light pull | Drive friction is normal |
Cold vs. Hot Tension: Why Chains Loosen While Cutting
Metal expands when it gets hot, and a working chainsaw generates an immense amount of heat. Understanding this simple physics principle will keep you from chasing your tail all afternoon.
When you start your saw first thing in the morning, the bar, chain, and drive components are cold. As you make cuts, the intense friction of high-speed steel rubbing against wood and metal drives temperatures up rapidly. That heat causes the steel links in the chain to expand and lengthen. A chain that felt perfect on your workbench will often develop a visible belly after three or four heavy bucking cuts.
The Thermal Expansion Trap
The biggest mistake beginners make is adjusting a chain when it is smoking hot. I fell into this trap repeatedly during my first year of running a saw.
You stop mid-cut, notice the chain is sagging, and tighten it right back down to a tight snap. Then you shut the saw down and walk away for lunch. As the metal cools back to ambient air temperature, the steel contracts. Because you tightened away the expansion slack, that shrinking chain acts like a mechanical tourniquet around your bar. It can warp your guide bar, crush the needle bearings on the clutch drum, or even bend your crankshaft.
| Chain Condition | Physical Behavior | What You Should Do |
| Cold (Before Starting) | Snug with zero sag on the bottom | Set to standard snap tension |
| Warm (Mid-Work) | Slight expansion and mild play | Let it run if links stay in rail |
| Hot (Directly After Heavy Cuts) | Significant expansion and droop | Cool down before fine-tuning |
Warning Signs Your Chain Tension Is Off
Your saw constantly sends you direct feedback through sound, vibration, and cutting speed. Learning to read these signals keeps minor tension issues from turning into expensive shop visits.
A saw with proper tension feels like a hot wire passing through butter. When tension wanders off in either direction, cutting efficiency drops off a cliff. You will feel yourself pushing harder against the rear handle to make progress, which is always the first warning that something in your cutting setup needs attention.
Symptoms of an Overtightened Chain
An overtightened chain forces your motor to waste horsepower simply overcoming internal friction. It robs you of cutting speed and destroys parts in record time.
The most obvious sign of an overtight chain is smoke coming from the bar rails despite having plenty of bar and chain oil in the reservoir. You will also smell scorched oil. If your chain continues to turn slowly at idle, or if the engine stalls the moment you release the throttle trigger, the chain is binding the clutch drum. Touch the nose sprocket cautiously with a gloved hand; extreme heat there points directly to excessive tension.
The Risks of a Loose, Sagging Chain
A loose chain is an immediate safety hazard that requires your full attention. When a chain sags, the drive links no longer align securely inside the guide bar groove.
As the chain whips around the bar tip, a loose link can jump the track completely. This is called a derailment. A derailed chain flails wildly at over 50 miles per hour, chewing up your chain catch pin, scoring the crankcase, and potentially whipping back toward your hands or legs. Loose chains also chatter violently in the cut, producing crooked, rough kerfs and raising your risk of a sudden kickback.
| Observed Symptom | Likely Cause | Recommended Fix |
| Smoke with full oil tank | Chain too tight | Loosen tension screw slightly |
| Chain jumps bar track | Chain too loose | Retension and inspect drive links |
| Engine bogs at idle | Extreme overtightening | Back off tension before restarting |
How to Adjust Your Chainsaw Chain Tension Step-by-Step
Adjusting chain tension is a basic maintenance skill that takes less than two minutes once you build the habit. Follow these steps to get a safe, consistent setup every single time.
Before touching anything, turn off the engine, switch off the ignition switch, or remove the battery if you run an electric saw. Make sure the chain brake is clicked backward into the off position. Trying to tension a chain with the brake engaged will bind the clutch assembly and give you a completely false tension reading.
Prepping the Saw and Setting the Bar Nuts
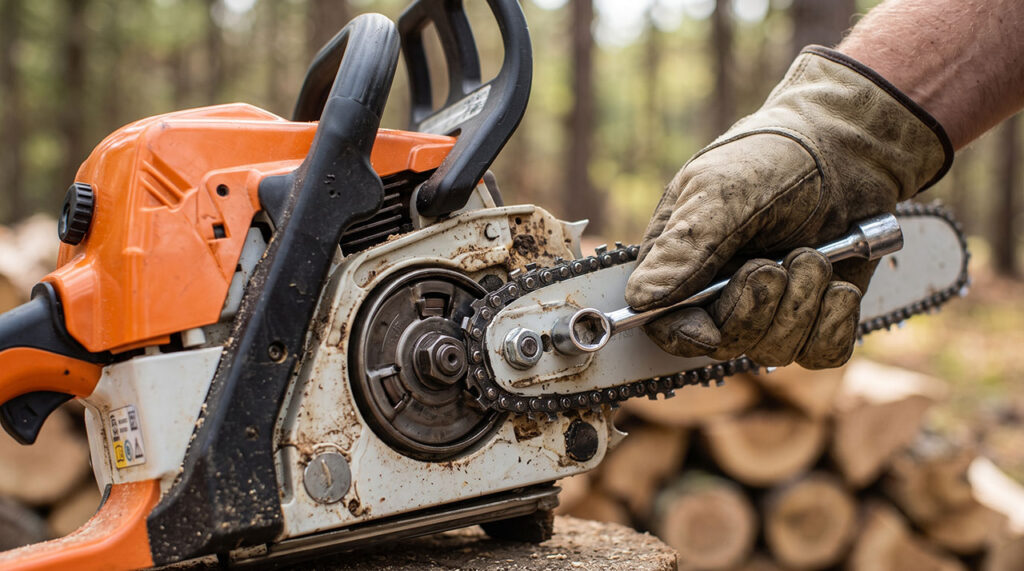
Grab your scrench—the combined screwdriver and socket tool that comes with your saw. You need to loosen the bar nuts, but you do not want to remove them entirely.
Back the bar nuts off roughly one to two full turns. You want the guide bar to have enough wiggle room to slide forward and back, but not so loose that it flops around on the mounting studs. If your saw uses a tool-less tensioning wheel on the clutch cover, flip out the wing lever and back the main locking dial off a couple of turns until the bar plate frees up.
Greenworks 60V 18-Inch Chainsaw: My Honest Real-World Experience
The Golden Rule: Lifting the Bar Nose
This is the single step that separates seasoned saw operators from frustrated novices. Always lift the tip of the guide bar upward while you set your final tension.
When you cut wood, the log pushes upward against the bottom of the guide bar. If you tension your chain with the bar nose resting downward, the very first cut you make will shove the nose up, instantly introducing slack to your chain. Lift the nose of the bar with your gloved hand, hold it up firmly, and then turn the tensioning screw clockwise until the chain draws snug against the bottom rail. Keep holding the nose up while you torque down the bar nuts.
| Adjustment Style | Advantages | Disadvantages |
| Side Scrench Screw | Very secure, fine control | Requires carrying a tool |
| Front Face Screw | Simple internal mechanism | Awkward angle near sharp teeth |
| Tool-Less Dial Wheel | Fast field tweaks without tools | Plastic parts can clog with debris |
Real-World Mistakes I Made So You Do Not Have To
I have made nearly every chain tension mistake in the book over the years. Sharing these slip-ups helps you bypass the frustrating learning curve I went through.
The most annoying mistake I made for months was ignoring the sawdust packed inside the bar groove. Hardened resin and fine wood flour collect in the rails, turning into a dense paste when mixed with bar oil. That gunk prevents the drive links from seating all the way down. I would set my tension perfectly, only for the chain to loosen up after two cuts as the teeth ground through the sawdust crust. Clean your bar rails with a putty knife or bar cleaning tool every time you change or sharpen a chain.
Another common pitfall involves brand-new replacement chains. New chains experience initial metal stretch as the rivets settle under load. When you throw on a fresh chain, it will stretch substantially during its first five minutes of work. If you do not stop to retension after your first couple of cuts, you run a huge risk of throwing the chain.
| Common Mistake | Why It Happens | Better Habit |
| Tensioning with brake locked | Forgetting to disengage brake | Always snap brake off before tuning |
| Letting bar nose drop down | Not supporting the bar tip | Hold nose up while tightening nuts |
| Ignoring packed bar rails | Skipping basic cleaning | Scrape grooves clean at every sharpen |
A Simple Tensioning Routine for Every Tank of Gas
Developing a steady maintenance rhythm keeps you from guessing about your tool’s condition. The best time to manage your saw is when you are already paused for routine refueling.
Every time your engine runs out of gas, your bar oil tank will be near empty as well. I use that natural work stoppage to run through a quick three-point inspection. Before filling the fluids, I brush away loose chips from the powerhead, check the bottom rail for chain droop, and give the chain a quick snap test.
Making your tension check part of your fueling habit means you catch loose chains long before they derail. It also gives the bar and chain five minutes to shed peak heat, ensuring you are not adjusting a scorching hot loop of steel.
| Work Phase | Inspection Timing | Core Objective |
| Cold Start | Before the first pull of the day | Set baseline snap and verify free spin |
| Tank Refill | Every fuel and oil top-off | Catch early stretch and clear chip dams |
| End of Day | Before storage in the shed | Loosen slightly if stored in cold shops |
Knowing When a Stretched Chain Needs Replacement
Every chainsaw chain has a finite lifespan, and metal can only stretch so far before it loses its structural integrity. Sometimes the reason you cannot keep proper tension has nothing to do with your adjustment screw.
Chains do not actually stretch because the steel plates lengthen; they stretch because the thousands of friction cycles wear down the tiny rivets connecting each link. Over time, that microscopic wear adds up to substantial slack across eighty drive links. Eventually, your tensioner pin will reach the absolute end of its travel slot on the guide bar, leaving you with a floppy chain even when the screw is maxed out.
Never try to fix this by taking a link out of an over-stretched chain to make it shorter. If a chain has stretched beyond the adjustment range of your bar, the metal around the rivet holes is severely worn and dangerously thin. Running a chain in that condition dramatically increases the chance of the chain snapping in half mid-cut. When you run out of adjustment slot room, retire the chain and hang a fresh one on the bar.
Finding That Tension Sweet Spot Every Time
Getting your chainsaw chain tension right is less about rigid rules and more about developing a quick feel for your equipment. Once you know the snap test and remember to hold that bar nose up, setting your saw becomes pure muscle memory. You will spend far less time fiddling with screnches and far more time making clean, effortless cuts through your woodpile.
Treat your cutting chain with care, pay attention to the warmth of the bar, and never ignore a chain that sags on the bottom rail. A well-tensioned saw runs cooler, uses less fuel, and keeps you safe every time you pull the starter cord.