Husqvarna Chainsaw Chain Adjustment: My Quick Guide
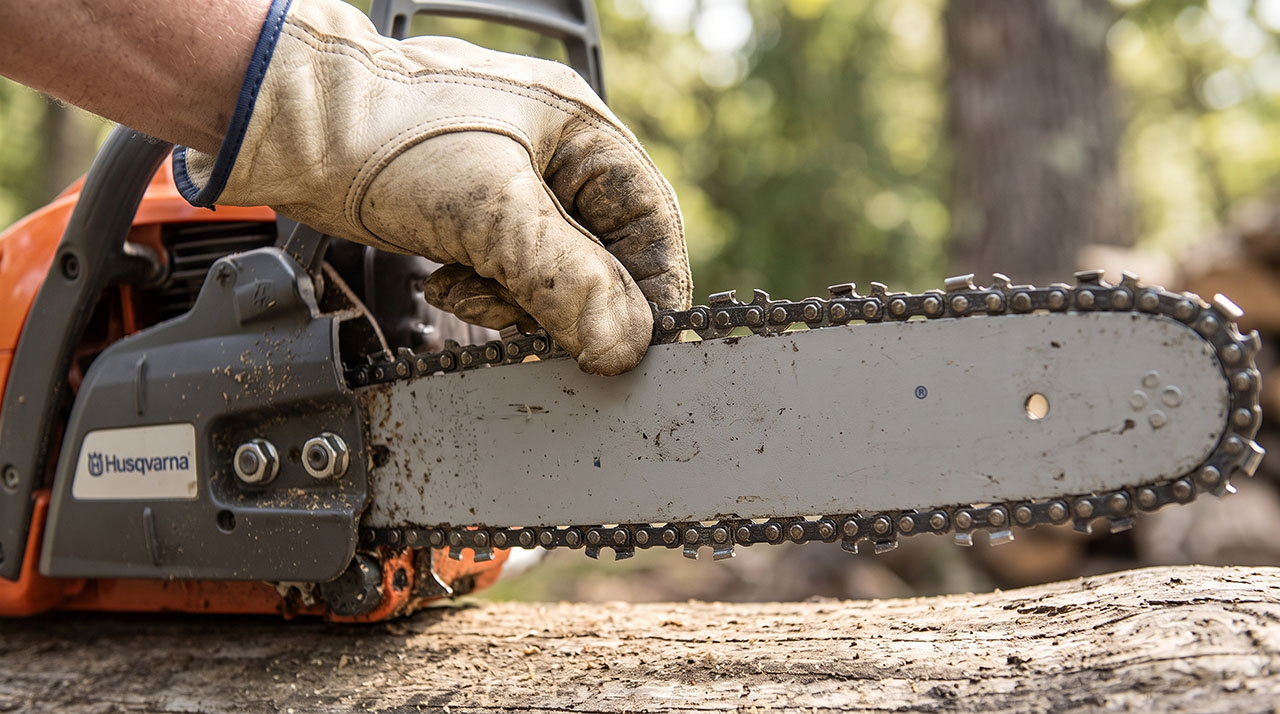
I remember the first time a chain popped right off my guide bar. I was cutting some old oak firewood in the backyard. Suddenly, there was a loud slap, and my chain was hanging loose. It scared me halfway to Sunday. I quickly realized that knowing how to handle a proper Husqvarna chainsaw chain adjustment is non-negotiable if you want to cut safely.
When you first buy a saw, no one really tells you how finicky chains can be. They stretch. They get hot. They sag. I spent my first few months guessing if my chain was too tight or too loose. After burning up a good guide bar and stretching a brand new chain, I finally sat down and learned how to do it right. Today, adjusting my saw takes me less than a minute. I want to share exactly how I do it, what mistakes to avoid, and how to keep your saw running smooth.
Why Proper Chain Tension Actually Matters
Before we get into the steps, we need to talk about why this matters. Chain tension is the heartbeat of your saw. If you get it wrong, you are going to ruin your equipment or hurt yourself.
The Danger of a Loose Chain
A loose chain is a massive safety hazard. I learned this the hard way. When a chain sags below the guide bar, it loses its grip on the sprocket. If you hit a tough knot in the wood, that loose chain can easily derail. A derailed chain can snap back toward your hands. Even with a chain catcher on your Husqvarna, a flying chain is terrifying. Loose chains also chew up the drive links. Once those links get battered, the chain will not seat properly in the bar groove anymore.
What Happens When It’s Too Tight
On the flip side, over-tightening is a great way to destroy your saw. I used to crank my tension screw down as hard as I could. I thought tighter meant safer. I was wrong. A tight chain creates massive friction. It will literally burn the oil right off your bar. I once noticed smoke pouring from my guide bar because the chain was choking it. A tight chain also stretches the metal links prematurely. You will end up replacing your chain twice as often.
| Tension State | How It Acts | Main Risk |
| Too Loose | Sags below the bar | Derailment and injury |
| Too Tight | Binds when pulled by hand | Burns the bar and stretches metal |
| Just Right | Snug but moves freely | Safe, efficient cutting |
Husqvarna Chainsaw Chain Adjustment: Step-by-Step
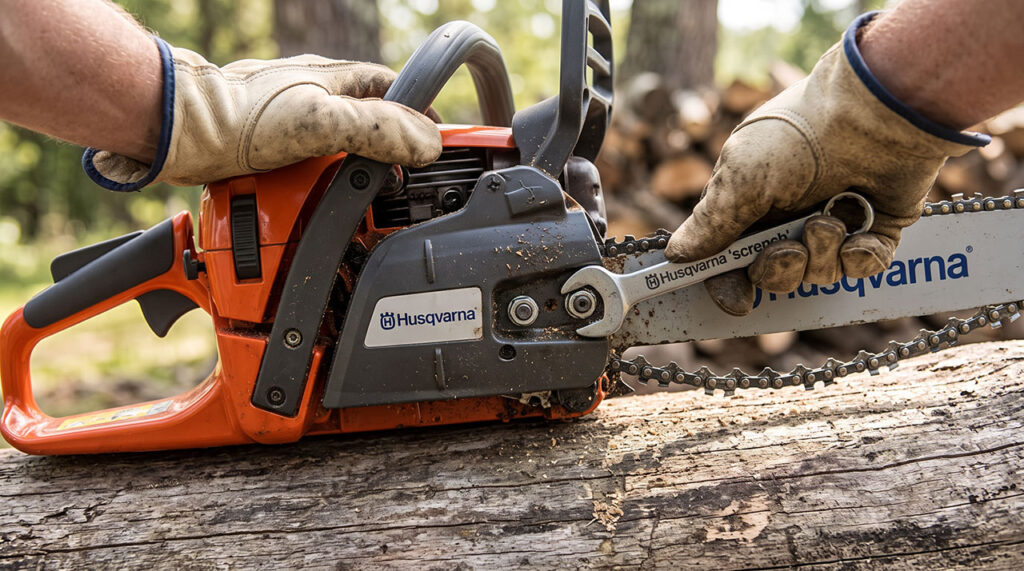
Getting the tension right is actually very simple once you know the routine. You only need your scrench—that combination T-wrench and screwdriver that came with your saw. Here is the exact process I follow every single time.
Prepping the Saw First
Safety always comes first. I never adjust a running saw. Turn the engine off. Let the saw sit for a few minutes if you were just cutting. The muffler gets dangerously hot, and you will be working right next to it. I always wear my heavy leather work gloves during this step. Chains are sharp, even when they are dull.
Loosening the Bar Nuts
Grab your scrench. Locate the one or two nuts holding the clutch cover over the guide bar. You do not need to take these nuts completely off. Just loosen them until they are finger-tight. If you take them off, you risk dropping them in the dirt. I have spent way too much time hunting for lost bar nuts in the grass.
Dialing in the Tension Screw
Now look for the tensioning screw. On most modern Husqvarna saws, this screw is on the side, right between the bar nuts. On some older or smaller models, it faces forward, parallel to the guide bar. Put your scrench into the screw. Turn it clockwise to tighten the chain. Turn it counter-clockwise to loosen it. Watch the chain as you turn the screw. You will see it slowly lift up tight against the bottom of the bar.
| Adjustment Step | Action | Why I Do It |
| Loosen Nuts | Back off bar nuts slightly | Allows the bar to move freely |
| Lift Nose | Pull up on the tip of the bar | Removes slack before tightening |
| Turn Screw | Turn clockwise until snug | Pulls the drive links into the groove |
The Hidden Trick: Lifting the Bar Nose
This is the most important part of a Husqvarna chainsaw chain adjustment. Most beginners miss this step. I missed it for a whole year. Before you tighten the tension screw, you must lift the nose of the guide bar with your free hand.
Gravity pulls the heavy tip of the bar down. If you adjust the chain while the bar is resting downward, the tension will be wrong the second you start cutting. When you press the saw into a log, the wood pushes the bar nose up. If you did not adjust the chain with the nose up, it will instantly go slack. I always lift the tip, tighten the screw, and keep holding the tip up while I lock the bar nuts back down.
The “Snap Test” (How I Know It’s Right)
So, how tight is tight enough? I use something called the snap test. It is the most reliable way to check your work.
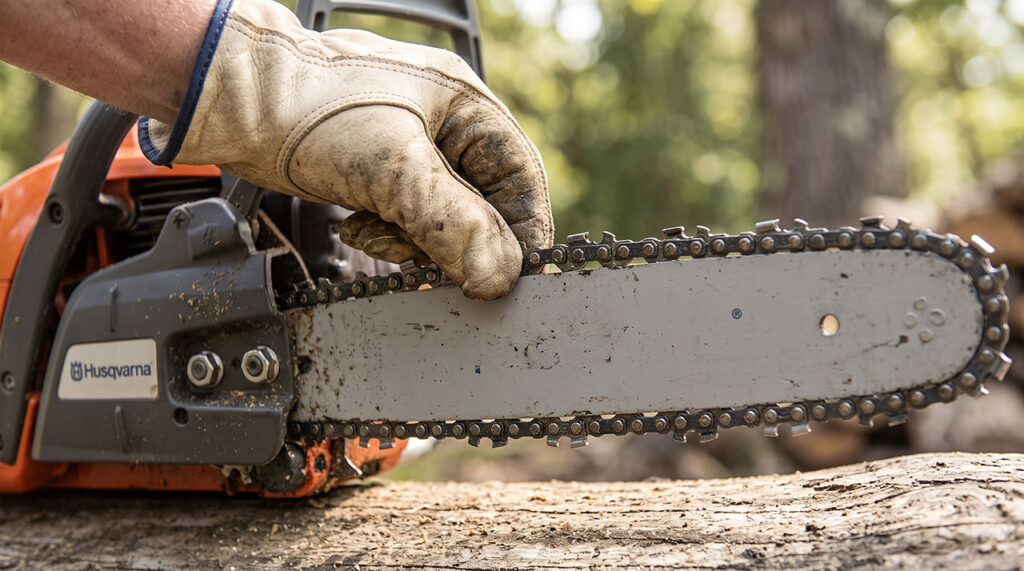
Once the bar nuts are tight, grab the chain right in the middle of the bottom of the guide bar. Pull it straight down. You should be able to pull the drive links just barely out of the bar groove. When you let go, the chain should snap right back into place with a sharp click. Next, try to pull the chain along the top of the bar. It should slide smoothly without binding. If you cannot pull it by hand, it is too tight.
| Snap Test Result | What It Means | Next Step |
| Chain won’t pull down at all | Way too tight | Loosen tension screw slightly |
| Chain hangs after snapping | Too loose | Tighten tension screw slightly |
| Snaps back, moves freely | Perfect tension | Ready to cut |
Dealing with Tool-less Tensioning Systems
Some Husqvarna models come with a tool-less tensioning system. You usually see these on battery saws or homeowner models. I have mixed feelings about them, but they do make adjustments fast.
Instead of a scrench, you have a fold-out plastic dial. You flip a lever to loosen the cover, then roll a thumb-wheel to tighten the chain. It is incredibly convenient. I used one on a small yard saw, and it was great for quick pruning jobs. However, they can get gunked up with oily sawdust very quickly. If you have a tool-less system, you have to keep that dial clean. Use an old toothbrush to clear out the wood chips, or the wheel will eventually jam.
Common Mistakes I Made Early On
Every chainsaw operator makes mistakes. It is just part of learning how to run power equipment. Here are the biggest errors I made regarding chain tension, so you can avoid them.
Adjusting While the Chain is Hot
This is a classic rookie mistake. When you cut wood, metal gets hot. When metal gets hot, it expands. If you run your saw hard for twenty minutes, your chain will heat up and get longer. It will look loose.
If you do a Husqvarna chainsaw chain adjustment while the chain is blazing hot, you will tighten it perfectly for that temperature. But when you put the saw away, the metal cools down. The chain shrinks back to its normal size. Because you tightened it, it will shrink so tight that it can bend your crankshaft or ruin your sprocket. Always let the chain cool for at least five minutes before making a final adjustment.
Forgetting to Clean the Bar Groove
Sometimes I would tighten my chain, but it still felt weird and jerky. I finally realized the groove in my guide bar was packed with hardened dirt, sap, and sawdust. The chain could not sit down fully into the bar.
Before I adjust my tension now, I always check the bar. I use a cheap groove cleaning tool (a putty knife works too) to scrape out the crud. If the groove is clean, the drive links can seat deeply, and your tension will be much more accurate.
| Mistake | Why It Happens | Better Approach |
| Hot Adjustments | Metal expansion tricks you | Let the chain cool down first |
| Dirty Bar Groove | Sawdust packs into the rail | Clean the groove regularly |
| Overtightening | Fear of chain derailment | Trust the simple snap test |
How Often Should You Really Check the Tension?
When I first started, I assumed I only needed to adjust the chain once a month. That was a terrible assumption. Chain tension changes constantly throughout a workday.
If I am putting a brand new chain on my Husqvarna, I expect it to stretch rapidly. New metal needs time to settle. I will check a new chain after the first five minutes of cutting. I usually have to tighten it immediately. After that, I check it after ten minutes, and then maybe half an hour later.
Once a chain is broken in, it holds tension much better. Even so, my rule of thumb is simple: I check my chain tension every single time I refill the gas tank. It takes five seconds to pull on the chain and do a snap test. If I am topping off the fuel and bar oil, I check the tension. It is a great habit to build.
Spotting Husqvarna Chainsaw Chain Adjustment Problems
Sometimes you turn the screw, but nothing happens. Or the chain stays loose no matter what you do. Over the years, I have run into a few mechanical quirks that can ruin your day. Here is how I handle them.
When the Chain Stretches Too Far
Eventually, chains stretch beyond the limits of your saw. I remember twisting my tension screw all the way to the right. It maxed out, but my chain was still sagging. This means the chain is dead.
Some guys will try to remove a drive link to shorten the chain. I do not recommend this. By the time a chain stretches that far, the metal is fatigued. The cutters are usually worn down anyway. When you run out of adjustment room on your tension screw, throw the chain away and buy a new one. It is not worth the safety risk.
Fixing a Jammed Tensioner Gear
If you turn the tension screw and it feels gritty or totally frozen, stop turning. Do not force it. You will strip the screw head.
Usually, this means a chunk of wood or hardened sap has jammed the tensioner pin inside the clutch cover. Take the bar nuts off. Remove the cover. Look at the little metal pin that moves back and forth. Hit it with some WD-40 or carb cleaner. Scrape away the gunk until it moves smoothly again. I try to clean this area out at the end of every cutting season.
| Problem | Likely Cause | Solution |
| Screw maxed out | Chain is totally stretched | Buy a replacement chain |
| Screw won’t turn | Debris jamming the gear | Clean and lube the pin |
| Chain won’t move | Chain adjusted way too tight | Back off the screw slightly |
Final Thoughts
Learning how to master a Husqvarna chainsaw chain adjustment took me a little time, but it is one of the most valuable skills I have. A properly tensioned chain cuts faster, runs cooler, and keeps you safe. You don’t have to be a professional lumberjack to get this right. Just remember to let the saw cool down, always lift the bar nose before you tighten, and trust the snap test.
Your chainsaw wants to work hard for you. If you take care of the chain, the saw will take care of the wood. Don’t overthink it, but don’t ignore it either. Keep your scrench handy, check your tension every time you fuel up, and you will get years of smooth cutting out of your equipment.