Husqvarna Chainsaw Tighten Chain Guide: My Easy Method
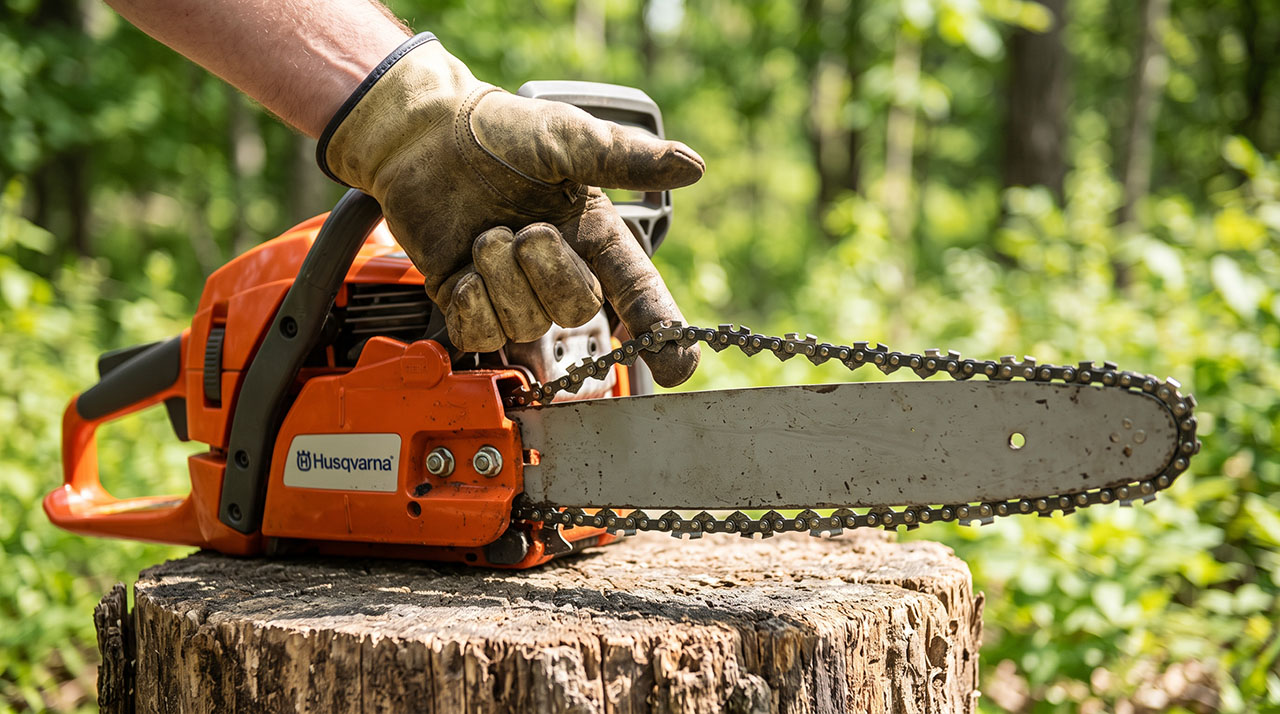
I love my Husqvarna chainsaw. It cuts through thick oak trees like butter. But nothing ruins a good day of cutting firewood faster than a loose chain. I learned early on that doing a Husqvarna chainsaw tighten chain adjustment is just a normal part of the job. If you ignore a loose chain, it will slip off the bar. That is scary, incredibly dangerous, and bad for your equipment.
You do not need to be a professional mechanic to fix this issue. It takes about two minutes once you learn the right tricks. I am going to share exactly how I do it in my own backyard. I will also share the embarrassing mistakes that cost me a perfectly good guide bar during my first year of cutting. You will learn how to keep your saw cutting fast, straight, and safe.
Husqvarna Chainsaw Tighten Chain Guide : How I Spot a Sagging Chain
You must catch a loose chain early. Do not wait for it to jump off the bar. I check my saw every single time I set it down on the grass. You should look at the bottom of the guide bar. The chain should rest snugly against the metal rails.
If you see a gap between the chain and the bottom of the bar, you have a problem. The chain looks like a sagging belly. When it gets this loose, it makes a strange slapping sound when you run the saw. You might also notice the saw feels jerky in your hands. This means the drive links are pulling out of the groove.
| What I See or Hear | What It Means |
| Daylight under the bottom bar rail | The chain is getting loose and needs a quick adjustment. |
| A loud slapping noise during cuts | The chain is dangerously loose and hitting the clutch cover. |
| The saw vibrates more than normal | The drive links are not sitting deep enough in the bar groove. |
The Famous Snap Test Explained
Looking at the chain is not always enough. I always use the snap test to check the true tension. This is a simple trick an old logger taught me. You must do this test while the saw is turned off. I also strongly suggest wearing heavy leather work gloves when you do this. The cutters are sharp and will easily slice open your fingers.
Grab the chain right in the middle of the top of the guide bar. Pull it straight up away from the metal. The chain should lift slightly, but the bottoms of the drive links should stay inside the bar groove. When you let go, the chain should snap right back down into place like a rubber band. If it slowly drops, or if you can pull the drive links completely out of the groove, your tension is wrong.
| Snap Test Result | My Recommendation |
| Chain snaps back hard and fast | Tension is perfect. You are ready to cut. |
| Drive links lift totally out of the groove | Tension is way too loose. Adjust it immediately. |
| Chain will not lift or move at all | Tension is way too tight. Loosen it before you ruin the bar. |
Husqvarna Chainsaw Tighten Chain: The Classic Method
Most traditional saws use two bar nuts and a metal tensioning screw. When you need a Husqvarna chainsaw tighten chain fix, you just grab your scrench tool. A scrench is that metal tool that came with your saw. It has a wrench on one end and a screwdriver on the other. Keep it in your back pocket.
Step 1: Prep and Safety First
Safety comes before everything else. I put the saw on a flat, solid surface. A tree stump works perfectly. I make sure the saw is turned completely off. Some people remove the spark plug wire just to be extra safe. Next, you must disengage the chain brake. Pull the front hand guard back toward the handle. If the brake is on, the clutch cover will not move, and you cannot adjust anything.
Husqvarna Chainsaw Starting Problems: How I Finally Fixed Mine
Step 2: Loosen the Bar Nuts
Take the wrench end of your scrench tool. Find the two large nuts on the side of the clutch cover. Turn them to the left to loosen them. Do not take them completely off. Just loosen them enough so the guide bar can slide up and down a little bit. If you take the nuts off, you will eventually drop them. I once spent an hour looking for a gray bar nut in a pile of dead brown leaves. It is a frustrating waste of time.
Step 3: Turn the Tension Screw
Look between the two bar nuts. You will see a flathead screw sitting right against the bar. This is the tensioning screw. Use the screwdriver end of your scrench. Turn the screw slightly to the right to tighten the chain. Turn it just a quarter turn at a time. Watch the bottom of the chain as you turn the screw. You will see the sagging belly slowly lift up and touch the metal rail.
Step 4: Lift the Nose and Lock It
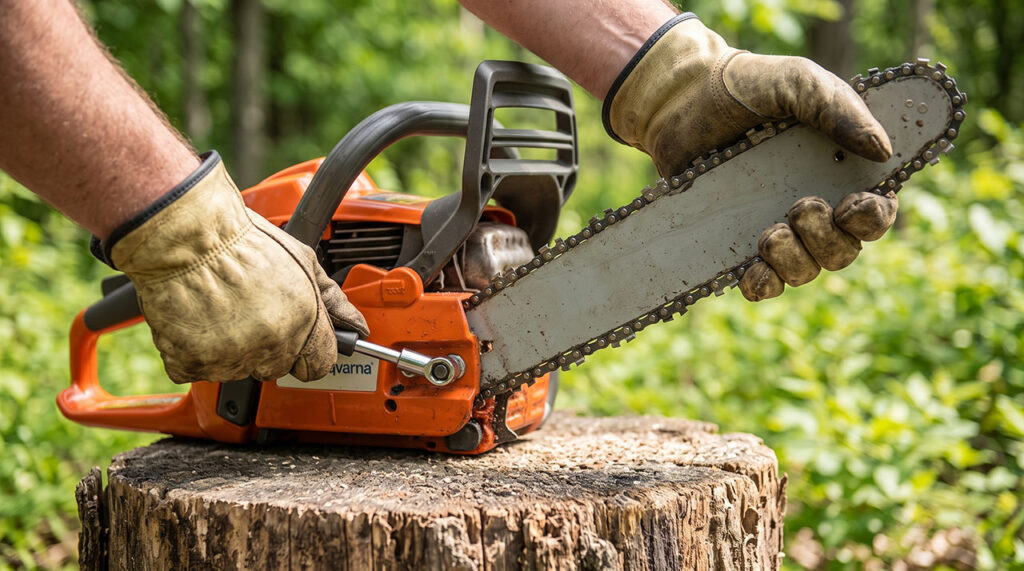
This is the biggest secret I ever learned. You must lift the nose of the guide bar while you tighten the nuts back down. I grab the tip of the bar with my gloved hand and pull it up. Then, I use my other hand to tighten the two bar nuts firmly with the scrench. If you forget to lift the nose, the bar will instantly drop the second you press it into a log. Your chain will become loose on the very first cut.
| Tightening Step | Why It Genuinely Matters |
| Disengaging chain brake | You cannot move the bar or change tension with the brake locked. |
| Leaving nuts on the bolts | It prevents you from losing tiny hardware in the dirt or grass. |
| Lifting the bar nose up | It locks the bar in its highest cutting position so it won’t drop later. |
My Thoughts on Tool-Less Tensioners
Some newer models do not use bar nuts at all. They have a tool-less tensioning system. You will see a large orange dial on the side of the saw instead of nuts. I bought a small saw with this feature a few years ago for light yard work. It is incredibly convenient. You just fold out a plastic flap, turn the dial to loosen the cover, and turn a smaller wheel to tighten the chain. You do not need to carry a metal scrench in your pocket.
However, I have some honest thoughts on these systems. They are great for small branches and weekend chores. But they never feel quite as secure to me as heavy metal nuts do. When I am cutting massive hardwood logs all day, I prefer the classic style. The tool-less dials can get packed with oily sawdust, making them hard to turn with gloves on.
| Feature | Standard Bar Nuts | Tool-Less Orange Dial |
| Speed of Adjustment | Slower, requires carrying a tool | Very fast, needs no tools |
| Clamping Strength | Very strong and durable | Good, but can loosen in heavy cuts |
| My Preference | Best for big jobs and thick logs | Best for quick, easy yard cleanups |
Three Mistakes That Ruined My First Guide Bar
I ruined my first guide bar because I did not understand how tension actually worked. I thought tighter was always better. I tightened my chain so much that it could barely spin by hand. When I started the saw, the engine bogged down. The friction created massive heat. The paint literally burned off the rails of my bar, and the metal turned blue.
Another mistake I made was tensioning a dirty saw. Sawdust and sticky bar oil build up under the clutch cover. This gunk gets stuck in the bar groove. If you do not clean that groove out with a small wire or a putty knife, the drive links will sit too high. You will get a fake tension reading. The chain will feel tight, but it will instantly loosen once the dirt falls out during a cut.
Finally, I used to tighten my chain while it was still blazing hot. This is a terrible idea. Metal expands when it gets hot. If you tighten a hot chain, it will shrink as it cools down overnight. The next morning, the chain will be so incredibly tight it might bend your crankshaft or damage your sprocket.
| The Mistake I Made | Why It Was a Bad Idea | A Much Better Approach |
| Over-tightening the chain | Creates high friction, burns the bar, and damages the engine. | Ensure the chain spins freely by hand after tightening. |
| Ignoring trapped dirt | Dirt pushes the chain out of the groove, giving a false tension feel. | Scrape the bar groove clean before setting the final tension. |
| Adjusting a hot chain | Shrinking metal snaps the chain or ruins internal bearings as it cools. | Let the saw cool down in the shade before tightening. |
Why Your Husqvarna Chain Keeps Getting Loose
Sometimes, I feel like I am constantly adjusting my saw. It can be annoying. But there are very normal reasons why a chain gets loose so often. Understanding these reasons stopped me from getting frustrated.
The New Chain Stretch
When you buy a brand new chain, the metal is perfectly tight. But as soon as you start cutting, the extreme pulling forces stretch the metal links. This is called the break-in period. During the first hour of cutting with a new chain, I usually have to stop and tighten it three or four times. This is totally normal. Do not panic and think your saw is broken. The stretching will eventually slow down.
Heat and Wood Friction
Friction is your biggest enemy. Pushing a metal chain through hard wood at high speeds creates extreme heat. Just like basic science teaches us, heat causes metal to expand. As the chain gets hot, it physically grows longer. A longer chain creates a sagging belly under your bar. This is why a Husqvarna chainsaw tighten chain routine is a repeating chore throughout the day. It is just physics.
| Cause of Loosening | How Fast It Happens | My Practical Solution |
| Brand new chain stretching | Happens within the first 10 minutes of cutting. | Stop and tighten repeatedly until the chain settles in. |
| Heat expansion from friction | Happens gradually over an hour of hard cutting. | Let the saw cool a bit, check bar oil flow, and re-tighten. |
| Normal wear on drive links | Happens slowly over months of regular usage. | Keep chains sharp so they pull less hard on the links. |
Knowing When It Is Time for a New Chain
There comes a point where tightening simply will not work anymore. Every guide bar has a limit. As you turn the tension screw over the months, the guide bar moves farther forward. Eventually, you will hit the end of the adjustment track. The tension screw will not turn any farther to the right.
When you hit this wall, the chain is officially stretched beyond repair. Do not try to force it. Do not try to remove a metal link to make it shorter. Just throw the chain in the recycling bin and buy a new one. Chains are wear items, just like the tires on your truck. They are not meant to last forever. I usually keep three spare, sharp chains in my truck box so a stretched-out chain never ends my workday early.
Final Thoughts
Learning how to properly adjust your equipment changes how you work. Dealing with a loose chain used to make me nervous. Now, it just takes a quick twist of my scrench, and I am right back to cutting logs. Remember to always lift the nose of your guide bar before locking those nuts down. That one simple habit will save you from having to re-tighten your saw every five minutes.
Always respect the tools you use. Keep the bar groove clean, never adjust the metal while it is burning hot, and always double-check your work with a quick snap test. A properly tensioned chain cuts faster, cuts straighter, and keeps you much safer in the woods. Buy an extra scrench, keep it in your pocket, and enjoy your time clearing brush.