How to Remove Blade from Ryobi Miter Saw
I still remember the first time I needed to change the blade on my saw. I had a big trim project lined up. My old blade was leaving burn marks and splintering the wood. I stared at the tool, realized I had lost the manual years ago, and thought, exactly how to remove blade from ryobi miter saw without breaking something? It seemed like it should be easy. I grabbed a wrench, cranked on the bolt, and it would not budge.
I spent twenty minutes getting increasingly frustrated before I realized two major things. First, there is a hidden button you must press. Second, the bolt tightens in the opposite direction of a normal screw. Once I figured out those quirks, the whole process took less than three minutes. I wrote this guide to save you from that exact same headache. Here is everything I learned about getting that stubborn blade off safely and easily.
Why I Decided to Change My Ryobi Miter Saw Blade
You might be wondering if you even need to change your blade yet. I put it off for months. I just kept pushing the saw harder through the wood. That was a bad idea. A dull blade is dangerous because it makes the saw jump.
It also ruins expensive wood. When I finally swapped my stock 24-tooth Ryobi blade for a fine 60-tooth blade, it felt like a brand new machine. The cuts were smooth like glass. No more sanding ends for ten minutes. If your cuts look rough, it is time for a change.
| Sign of Wear | What It Means |
| Black burn marks on wood | The blade is dull and creating friction. |
| Splintered edges (tear-out) | Teeth are chipped or not fine enough. |
| Motor sounds strained | The saw is working too hard to cut. |
Essential Tools You Need Before Starting
Before you start taking things apart, gather your tools. You really do not need much. Ryobi is actually great about this. They usually include the exact tool you need right on the saw itself.
Look at the back right side of the base or near the carrying handle. You should see a small wrench or hex key clipped into a little slot. If you lost it, do not worry. A standard set of tools will work just fine.
| Tool | Purpose |
| Ryobi Blade Wrench / Hex Key | To loosen the arbor bolt holding the blade. |
| Phillips Head Screwdriver | To loosen the blade guard plate screw. |
| Work Gloves | To protect your hands from sharp teeth. |
Step-by-Step: How to Remove Blade From Ryobi Miter Saw
This is the exact process I use every single time. It works for almost all Ryobi sliding and compound miter saws. Take your time the first time you do this. It becomes second nature after a while.
Step 1: Disconnect the Power (Do Not Skip This)
I cannot stress this enough. Unplug the saw from the wall. Do not just rely on the trigger safety. If you have a cordless 18V or 36V Ryobi saw, pull the battery completely out.
You will have your hands deep inside the blade housing. One accidental bump of the trigger could be disastrous. I always place the plug on the table right in front of me. That way, I have visual proof that the machine is dead.
Step 2: Remove the Blade Guard Bracket
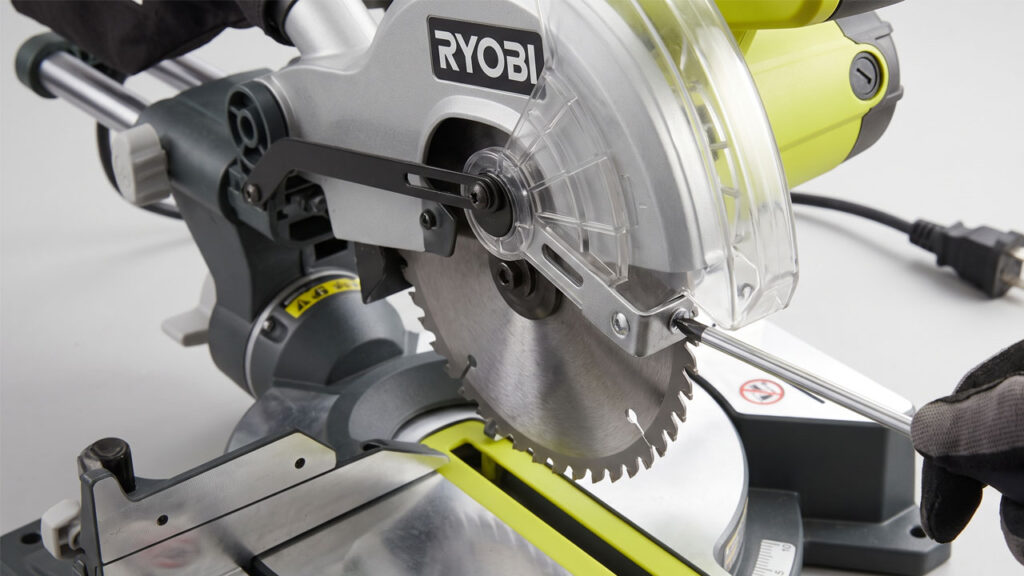
You cannot get the blade out with the clear plastic guard in the way. To move it, you need to loosen a specific screw. Pull the saw handle down slightly to expose the center plate.
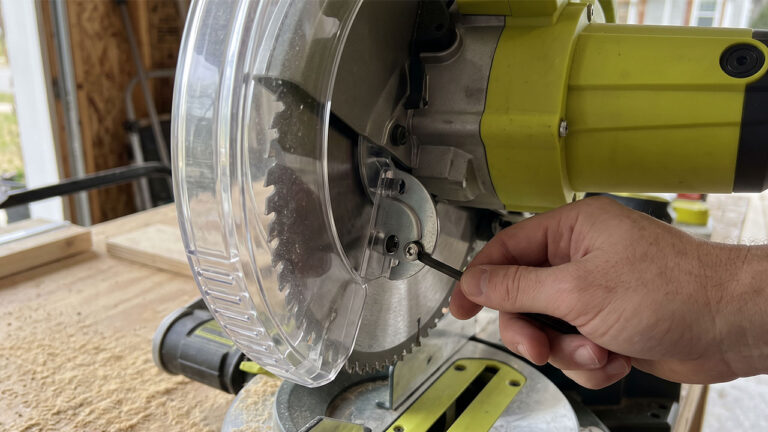
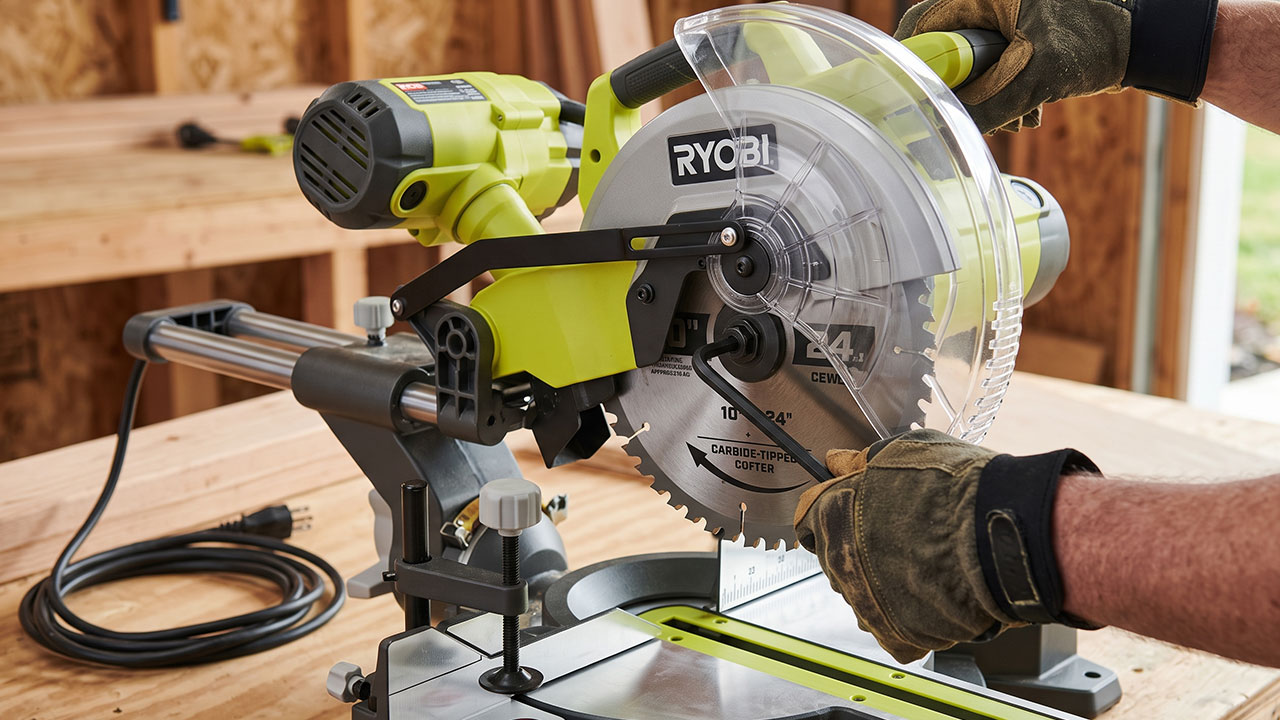
Find the small Phillips head screw holding the metal bracket for the clear plastic guard. You do not need to take the screw completely out. Just loosen it enough so you can lift the bracket up and out of the way. This exposes the main arbor bolt holding the blade.
Step 3: Locate and Press the Spindle Lock Button
This is the secret step I missed my first time. If you just try to turn the wrench, the blade will just spin. You have to lock the motor.
Look behind the blade housing, usually on the right side of the motor. You will see a small, round button. Press it in. While holding it down, use your other hand to slowly rotate the blade. You will feel the button click and drop deeper into a hole. Keep holding it. The blade is now locked.
Step 4: Loosen the Arbor Bolt (The Reverse Thread Rule)
This is where most people get stuck. Miter saws use reverse threads. This stops the blade from loosening itself while it spins at high speeds.
To loosen the bolt, you must turn it clockwise. Yes, you turn it to the right to loosen it. Righty-loosey, lefty-tighty. Use your hex key or wrench. It might be a little stiff, but it will pop free.
| Action | Direction to Turn | Result |
| Loosening the bolt | Clockwise (Right) | Bolt comes out. |
| Tightening the bolt | Counter-Clockwise (Left) | Bolt secures blade. |
Step 5: Carefully Slide the Old Blade Out
Once the bolt is out, set it somewhere safe. A magnetic tray is perfect for this. Next, pull off the outer washer. Notice how it sits against the blade.
Now, grab the blade from the bottom. Wiggle it slightly and slide it down and out from the bottom of the guard. Watch your knuckles. Even a dull blade is sharp enough to scratch you up. I always wear leather gloves for this exact step.
The Reverse Thread Trap: A Mistake I Made
I need to talk more about the reverse thread on the arbor bolt. I learned this lesson the hard way. During my first blade change, I treated it like a normal screw. I put the wrench on and turned it to the left with all my might.
It did not move. So, I grabbed a piece of metal pipe to use as a breaker bar. I cranked it to the left so hard that I actually stripped the head of the bolt. I had to order a replacement part and wait a week to finish my project. Always remember: turn clockwise to loosen.
| Common Mistake | The Better Approach |
| Turning left to loosen | Turn right (clockwise) to loosen. |
| Taking the guard screw all the way out | Just loosen it and pivot the plate up. |
| Doing this without gloves | Wear gloves to prevent nasty cuts. |
Installing the New Blade Correctly
Getting the old blade off is only half the battle. Putting the new one on correctly is just as important. I once put a blade on backward and wondered why the saw was smoking and burning the wood.
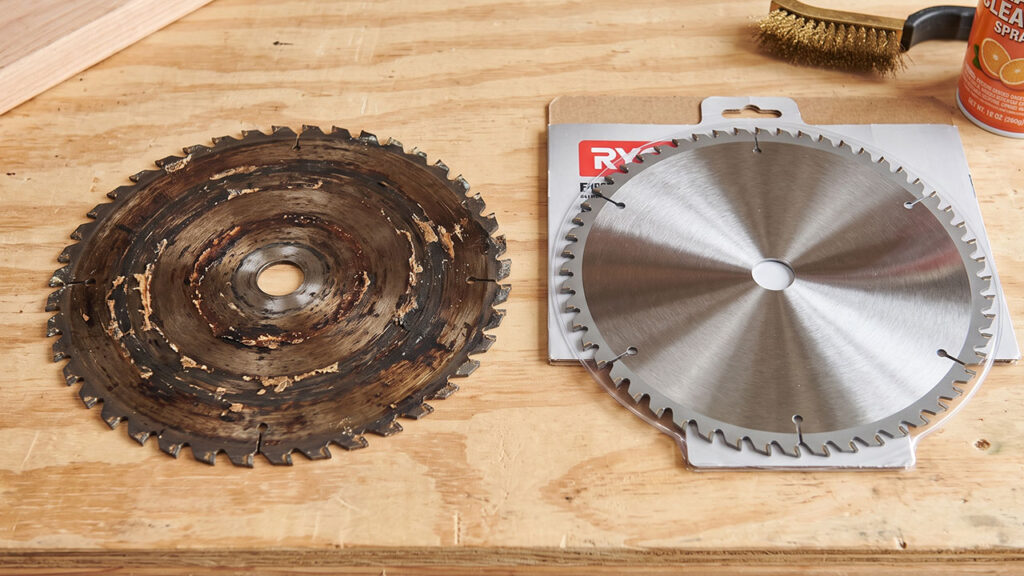
Take the new blade out of the package carefully. Wipe down the inner washer on the saw to remove any sawdust buildup. This ensures the new blade sits perfectly flat.
Paying Attention to Directional Arrows
Look at the front of your new blade. You will see an arrow printed on it. Now look at the blade guard on your Ryobi saw. There is an arrow molded into the plastic or metal there, too.
These arrows must point in the same direction. As a general rule, the teeth at the bottom of the blade should point down and forward, toward you. If they point backward, flip the blade around.
Seating the Washers Perfectly
Slide the new blade up into the housing and onto the arbor. It should fit snugly. Now put the outer washer back on.
How to Cut 45-Degree Angles with a Miter Saw
This washer is usually cupped. The flat edge must press flush against the blade. Thread the bolt back in by hand by turning it to the left. Press the spindle lock button again, and tighten the bolt firmly with your wrench. Do not over-tighten it. The spinning action of the saw will keep it tight.
| Feature | Best For | Teeth Count |
| Coarse Blade | Fast, rough cuts (framing lumber) | 24 – 40 Teeth |
| Fine Blade | Clean, smooth cuts (trim, baseboards) | 60 – 80 Teeth |
| Ultra-Fine Blade | Delicate materials (MDF, laminates) | 80+ Teeth |
Troubleshooting Common Blade Removal Problems
Sometimes things do not go exactly according to plan. Over the years, I have run into a few annoying roadblocks while maintaining my tools.
If your saw has been sitting in a damp garage, or if you use it heavily every single day, parts can get sticky. Here is how I handle the most common issues you might run into.
The Spindle Lock Won’t Engage
You are pressing the button, spinning the blade, and nothing clicks. This usually happens when sawdust gets jammed behind the button mechanism.
Take an air compressor or a can of compressed air. Blow air directly into the gaps around the spindle lock button. Wiggle the button back and forth a few times. Usually, this knocks the dust loose, and the pin will finally drop into the locking hole.
The Arbor Bolt is Completely Stuck
You are turning it clockwise, but the bolt refuses to budge. This happens if the last person over-tightened it, or if it has rusted slightly.
Do not force it to the point of stripping the metal. Spray a tiny bit of penetrating oil (like WD-40) right on the bolt head. Let it sit for ten minutes. Then, put your wrench on the bolt and give the end of the wrench a gentle tap with a rubber mallet. The quick shock usually breaks the rust seal.
| Problem | Quick Solution |
| Spindle lock won’t click | Blow compressed air behind the button. |
| Arbor bolt is stuck tight | Use penetrating oil and tap wrench with a mallet. |
| Blade wobbles after install | Remove and clean sawdust from behind washers. |
Best Practices for Blade Maintenance
Once you know how to swap a blade, you want to make sure your new one lasts a long time. Good blades are not cheap.
I used to throw blades away when they stopped cutting well. Then I learned that they often are not dull. They are just dirty. Wood sap and resin build up on the teeth over time. This sticky mess creates friction, making the blade feel dull.
Every few months, I take the blade off using the steps above. I spray it with a citrus-based blade cleaner or simple oven cleaner. Let it sit for a few minutes, then scrub it with a brass wire brush. The pitch melts right off. You will be amazed at how sharp the blade feels afterward. Taking ten minutes to clean your blade can save you sixty bucks on a new one.
Final Thoughts
Learning how to remove blade from ryobi miter saw is a rite of passage for any DIYer. The first time feels a bit awkward, especially when you are fighting that reverse thread. But once you understand the simple mechanics of the spindle lock and the arbor bolt, it is a breeze. I can swap a blade out now in under two minutes flat.
My biggest piece of advice is to respect the tool. Always unplug it first. Keep your fingers clear of the teeth, and double-check those directional arrows before you fire it back up. Keeping a sharp, clean blade on your saw changes the entire woodworking experience. Your cuts will be cleaner, your saw will last longer, and your projects will look vastly more professional.