How to Tighten Chain on Mini Chainsaw: My Step-by-Step Guide
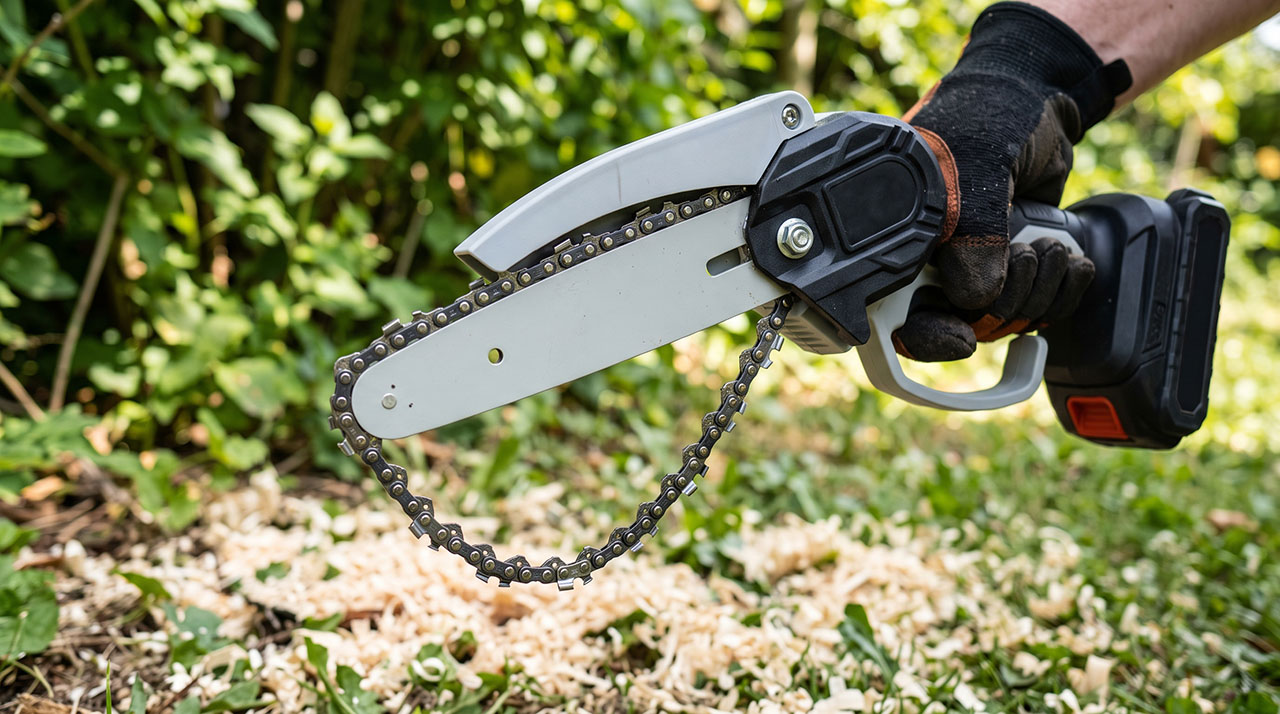
I remember my first afternoon trimming branches in the backyard. I bought one of those handy six-inch battery-powered saws, thinking it would make quick work of an overgrown oak tree. About ten minutes into the job, the chain popped right off the guide bar and dangled there.
I had no idea how to tighten chain on mini chainsaw models back then. I just stared at the loose metal teeth, feeling a bit silly and totally stuck. Since that day, I have learned a lot about getting the tension just right. It is not hard once you understand how the tool works, and I want to share exactly how I do it to keep cutting safely.
Why Your Mini Chainsaw Chain Keeps Getting Loose
Before we fix the problem, it helps to know why it happens. Mini chainsaws are incredible little tools, but they drop chains often.
I used to think my saw was broken when the chain kept sagging. It turns out, this is just how chainsaws behave. Metal parts shift, stretch, and react to the environment while you cut.
The heat expansion factor
When metal gets hot, it expands. Friction between the chain and the wood creates a massive amount of heat.
As you cut branches, the metal chain physically grows longer. Even a tiny bit of stretch is enough to make the chain sag off the bottom of the bar. I learned this the hard way after trying to cut dry, hard wood without taking a break.
Breaking in a brand-new chain
New metal always stretches the most during its first few uses. People call this the break-in period.
If you just bought your saw, expect to tighten it three or four times during your first yard cleanup. It is completely normal. Do not panic and think you bought a bad tool; it just takes time for the metal links to settle.
| Symptom | Common Cause | Quick Solution |
| Sagging after five minutes | Heat expansion | Let it cool down, then tighten |
| Loose on very first use | Normal break-in stretch | Tighten frequently on day one |
| Will not stay tight at all | Stripped tension screw | Check threads and clean debris |
Warning Signs Your Chain is Getting Loose
You do not want to wait for the chain to fall off entirely. Falling chains can be dangerous and damage the tool.
I have learned to pay attention to how the saw feels in my hands. The tool will actually tell you when it needs adjusting if you know what to look for.
The sound of the motor changes
A tight, well-oiled chain has a smooth whirring sound. A loose chain sounds completely different.
When the chain gets loose, it starts slapping against the metal guide bar. You will hear a distinct rattling or clanking noise over the sound of the motor. The moment I hear that rattle, I stop cutting immediately.
The cuts start drifting sideways
A properly tensioned saw cuts straight down through a branch. It takes very little physical effort.
When the chain gets loose, the teeth lose their grip on the guide bar track. The saw will start to pull to the left or right, creating a curved cut. If I feel myself fighting the saw to keep it straight, I know it is time to check the tension.
Safety Steps Before You Touch the Blade
I cannot stress this enough. These tools might look like toys, but they will easily cut through fingers. You must respect the blade.
I once caught myself reaching for the loose chain while my finger was still resting near the trigger. That was a huge wake-up call for me. Now, I follow a strict routine every single time.
| Safety Step | The Real Reason I Do It |
| Pull the battery out | Prevents accidental starts if I bump the trigger |
| Wear leather work gloves | Protects fingers from sharp chain teeth |
| Let the metal cool down | Prevents burns from hot guide bars |
How to Tighten Chain on Mini Chainsaw: Step-by-Step
Let us get down to the actual adjustment process. You usually only need the small wrench or screwdriver that came in the box with your saw.
Most mini chainsaws have a very similar design. There is a side plastic cover, a nut holding that cover on, and a small screw to adjust the tension. Here is my exact method.
Step 1: Loosen the cover nut just a little
Do not take the nut all the way off. Just loosen it with your wrench until it is slightly relaxed.
If you leave it fully tightened, the tension screw inside will not turn at all. If you take the nut completely off, the cover falls away and the bar drops into your lap. Just a half-turn counterclockwise usually does the trick.
Step 2: Locate and turn the tension screw
Find the small screw on the side of the saw. Sometimes it sits right next to the nut, and sometimes it is near the front of the bar.
Turn this screw clockwise to tighten the chain. Go slowly. Half a turn is often all it takes to pull the slack out of the metal. Watch the bottom of the guide bar as you turn the screwdriver; you will see the metal links lift back up into the groove.
Best 12-Inch Battery Chainsaw: Top Models
Step 3: Check the snap-back tension
This is the most critical part of the process. You need to know by feel if the chain is tight enough.
Pinch the chain in the middle of the bottom of the guide bar. Pull it straight down. You should be able to pull it slightly away from the bar, revealing maybe one or two drive teeth. When you let go, it should snap right back into the metal track.
Step 4: Lock it all down
Once the snap-back feels right, hold the tip of the guide bar up slightly with your fingers.
While holding the bar up, tighten the side cover nut back down firmly. Make it snug, but do not strip the plastic threads. Tightening the nut while lifting the bar keeps everything aligned perfectly for your next cut.
| Common Mistake | Why It Fails | Better Approach |
| Forcing the tension screw | Strips the internal gears | Loosen the cover nut first |
| Tightening while hot | Chain shrinks later and snaps | Let the saw cool down first |
| Taking the cover fully off | Parts fall out of alignment | Only loosen it a half-turn |
The Snap Test: How Tight is Tight Enough?
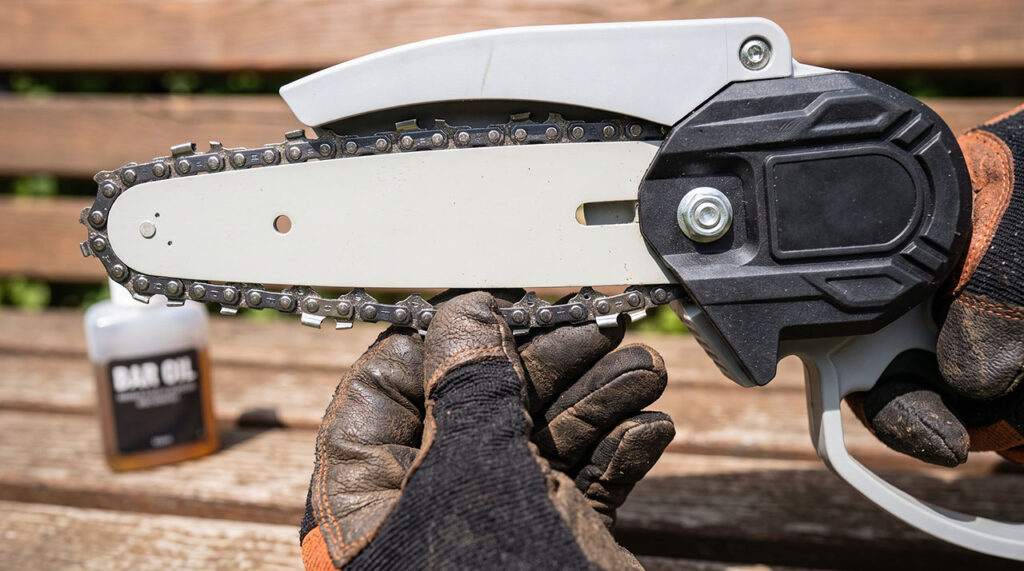
Getting the tension right is a balancing act. If it is too loose, it derails. If it is too tight, it burns out your motor.
I used to tighten my chain as hard as I could. I thought tighter meant safer. Instead, my battery died in five minutes, and the motor smelled like burning plastic because it was working too hard.
The chain needs to glide freely along the track. If you cannot pull the chain around the bar easily by hand (with the battery out and gloves on), it is way too tight. It should move smoothly with just a gentle tug, while still snapping back into place when you pull it down.
Tool-Free vs Traditional Tensioners
There are generally two types of mini chainsaws on the market today. Knowing which one you have changes how you adjust it.
I own both styles, and they both have their own little quirks. The basic concept is the same, but the hardware looks different.
Dealing with traditional nut and screw models
These are the most common models. They require a physical wrench and a Phillips head screwdriver.
They take a bit more time to adjust, but I actually prefer them. They hold their tension much better over long cutting sessions. You just have to remember to keep the little tools in your pocket.
Figuring out the tool-free knobs
Newer models come with a large plastic dial on the side. You turn one part to loosen the cover, and another part to tighten the chain.
These are incredibly fast to adjust in the field. However, I notice that the plastic gears slip more easily. Dust often gets behind the dial, making it hard to turn with sweaty hands.
What to Do If the Tension Screw Won’t Turn
Sometimes, things get stuck. You turn your screwdriver, but the tension screw simply refuses to budge.
Do not force it. I completely stripped a tension screw on my first mini chainsaw because I pushed too hard. Usually, there is a very simple reason it is jammed.
Wood sap and sawdust mix with chain oil to form a hard, sticky crust inside the plastic housing. If the screw is jammed, take the side cover completely off. Use an old toothbrush to clean the junk out of the gear threads, then try again.
| The Issue | Likely Cause | Troubleshooting Step |
| Screw will not turn | Sawdust jammed in gears | Remove cover and scrub with a brush |
| Screw turns but chain stays loose | Tension pin missed the bar hole | Realign pin into the guide bar hole |
| Cover nut spins endlessly | Threading is stripped | You need a replacement nut or cover |
My Routine for Keeping the Chain on Track
Tightening the chain is just one part of the battle. Preventing it from falling off in the first place is the ultimate goal.
I developed a few habits that keep my saw running smoothly. These quick steps save me so much frustration on a Saturday afternoon when I just want to finish my yard work and relax.
Keeping things heavily oiled
Many cheap mini chainsaws do not feature automatic oilers. You have to add the lubrication manually.
I keep a small squirt bottle of standard bar and chain oil in my pocket. Every ten minutes of cutting, I squirt a little oil directly onto the top of the chain. This drastically reduces the heat expansion I mentioned earlier. Less heat equals less stretching and fewer stops to tighten it.
Clearing out the wood chips
The small hollow space under the side plastic cover fills up with wood chips incredibly fast.
When that space gets packed tight, the debris pushes the chain right off the drive sprocket. I pull the cover off after every major cutting session and wipe it clean. It makes a huge difference in how well the chain stays seated.
| Maintenance Task | How Often I Do It | Why It Matters |
| Apply bar and chain oil | Every 10 to 15 minutes | Reduces heat and chain stretching |
| Clean behind side cover | After every work session | Stops debris from derailing the chain |
| Inspect drive sprocket | Once a month | Ensures teeth are not worn flat |
When to Stop Tightening and Just Replace the Chain
Metal chains certainly do not last forever. There comes a specific point where no amount of adjusting will fix your problem.
I spent an entire hour once trying to tighten a chain that kept sagging immediately. It turned out, the chain was just completely worn out. It had stretched beyond the physical limit of the tensioner gear.
If you have the tension screw turned all the way to the tightest position and the chain still hangs loose, the chain is done. Do not try to remove a link to shorten it. Replacement chains for these mini saws are very cheap online. Keep a spare one ready in your toolbox so you never get stranded in the middle of a project.
| Condition | Visual Sign | Action Required |
| Good Chain | Tension screw sits in the middle | Keep adjusting and cutting |
| Worn Out Chain | Tension screw maxed out to the right | Throw away and replace chain |
| Damaged Chain | Missing or bent metal cutting teeth | Replace immediately for safety |
Final Thoughts
Learning how to tighten chain on mini chainsaw models is a basic skill, but it changes everything about using the tool. Once you get the feel for the snap test and understand the mechanics behind it, you will never second-guess yourself again. You will cut faster, keep your battery charged much longer, and stay incredibly safe while working in the yard.
The biggest takeaway is simply to pay attention to your saw. Stop often, check the tension with your fingers, add a little squirt of oil, and brush off the sawdust. Take care of the tool, and it will take care of your pruning chores without breaking a sweat. Have you checked your chain tension lately?