How to Change the Blade on Ryobi Miter Saw Safely
I still remember the first time I tried to swap out my saw blade. I spent twenty minutes sweating in my garage, pulling on a wrench with all my body weight. I was completely baffled as to why the bolt would not budge. It turns out, I was tightening it the entire time. If you are trying to figure out how to change the blade on ryobi miter saw, you are in the right place. I have made all the frustrating mistakes so you do not have to.
Changing a miter saw blade seems intimidating at first. You are dealing with a heavy machine and incredibly sharp metal. But once you understand the hidden buttons and reverse threads, the whole process takes less than five minutes. In this guide, I will walk you through the exact steps, share some tricks I learned the hard way, and help you get back to making clean, perfect cuts.
Why You Need to Swap Your Saw Blade Eventually
Most people buy a miter saw, use the stock blade for years, and wonder why their cuts look terrible. I did the exact same thing. Factory blades are okay for rough tasks, but they have limits.
Signs Your Current Blade is Dull
Woodworking gets dangerous and frustrating when your tools are not sharp. You will notice a few clear warning signs when you cut. The saw might struggle to push through a standard 2×4. You might smell burning wood, or see dark scorch marks on your freshly cut edges. A dull blade also causes severe tear-out, splintering the back of your wood instead of slicing it cleanly.
Choosing the Right Blade for Your Project
The stock Ryobi blade usually has 24 or 40 teeth. It works fine for rough framing framing, but it ruins expensive baseboards. You need to match the blade to your project. More teeth mean a smoother cut, but a slower feed rate.
| Project Type | Recommended Blade Type |
| Rough framing (2x4s) | 24 to 40-tooth general purpose blade |
| Baseboards and crown molding | 80 to 90-tooth fine finish blade |
| Cutting PVC or plastics | 80-tooth or specialized plastic-cutting blade |
Tools You Will Need Before Starting
You do not need a massive toolbox for this job. In fact, you likely already have everything you need right in front of you.
The Secret Tool Hidden on Your Ryobi
Almost every Ryobi miter saw comes with a specialized blade wrench. Look closely at the base of your saw, usually near the back right corner or tucked into the handle. You will find a small metal tool securely snapped into a plastic holder. One end is a hex key, and the other end is often a Phillips head screwdriver. This single tool does the entire job.
Step-by-Step: How to Change the Blade on Ryobi Miter Saw
This process is highly logical once you do it once. Just take your time, and do not force anything that feels completely stuck. Let us walk through it together.
Step 1: Unplug and Secure the Saw
Do not skip this step. Never rely on just keeping your finger off the trigger. Pull the plug out of the wall outlet. If you have an 18V cordless Ryobi saw, remove the battery completely. You want the machine entirely dead before your hands get near those sharp teeth.
Step 2: Move the Blade Guard Out of the Way
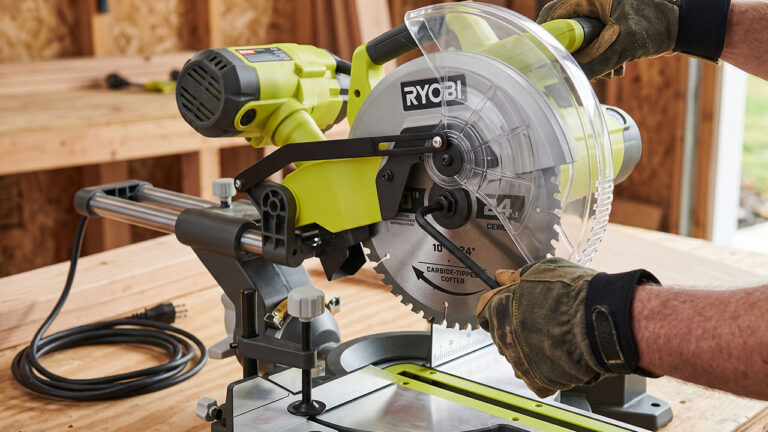
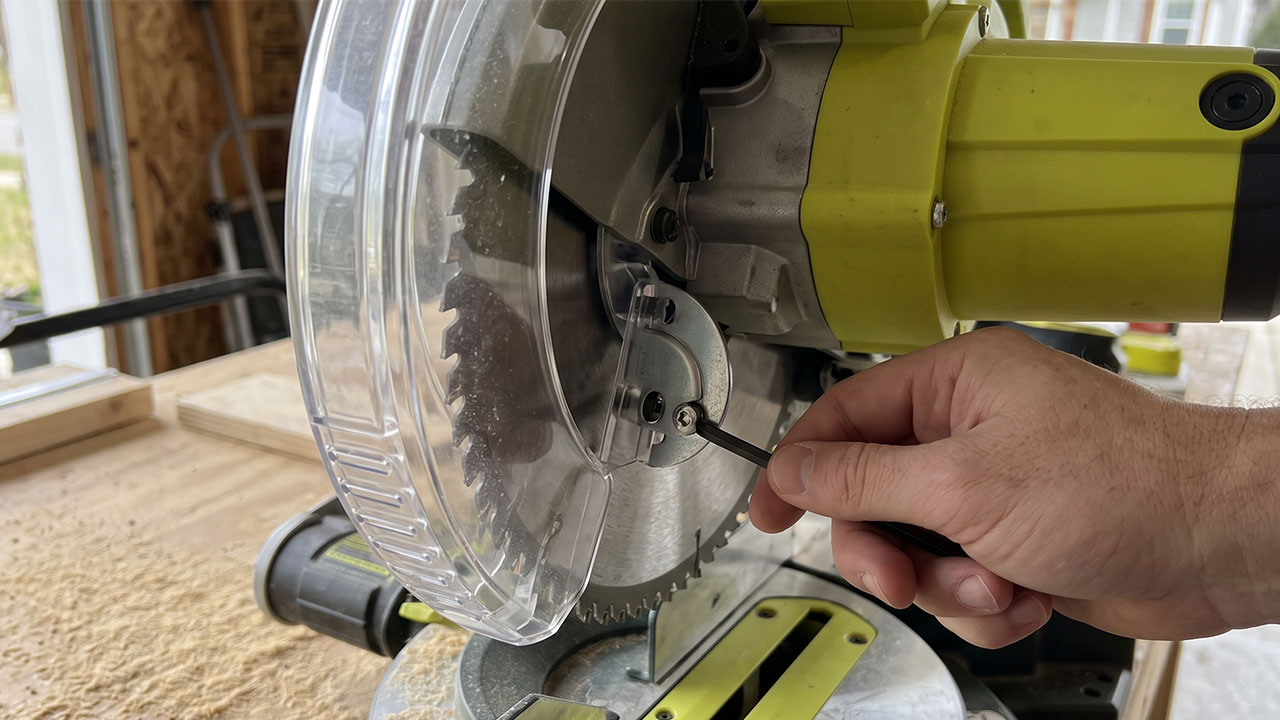
Ryobi saws have a clear plastic guard covering the blade. You cannot reach the center bolt without moving a metal linkage bracket out of the way first. Use your screwdriver to loosen the single screw holding the guard bracket plate. You do not need to take the screw out completely. Just loosen it enough to pivot the metal plate up and expose the arbor bolt.
| Guard Problem | Quick Fix |
| Bracket won’t pivot | Loosen the center screw one more full turn. |
| Screw is completely stuck | Spray a tiny drop of WD-40, wait five minutes, and retry. |
Step 3: Find and Press the Spindle Lock
You cannot loosen the bolt if the blade keeps freely spinning in circles. The spindle lock is your best friend here. Look behind the blade housing or on the right side of the motor casing. You will see a small, usually black, push-button. Press and hold it inward. Slowly rotate the saw blade with your other hand until you feel the lock click into place. The blade will stop moving.
Step 4: Loosen the Arbor Bolt (The Reverse Thread Trap)
This is where I messed up big time on my first attempt. Miter saw bolts are reverse-threaded. The spinning motion of the saw is designed to constantly tighten the bolt so the blade never flies off. To loosen it, you must turn the wrench clockwise. Remember: righty-loosey, lefty-tighty.
| Miter Saw Myth | The Reality |
| You need a socket wrench to remove the bolt. | The included hex wrench provides plenty of leverage. |
| All bolts loosen to the left. | Arbor bolts loosen to the right to prevent accidents. |
Step 5: Remove the Outer Flange and Old Blade
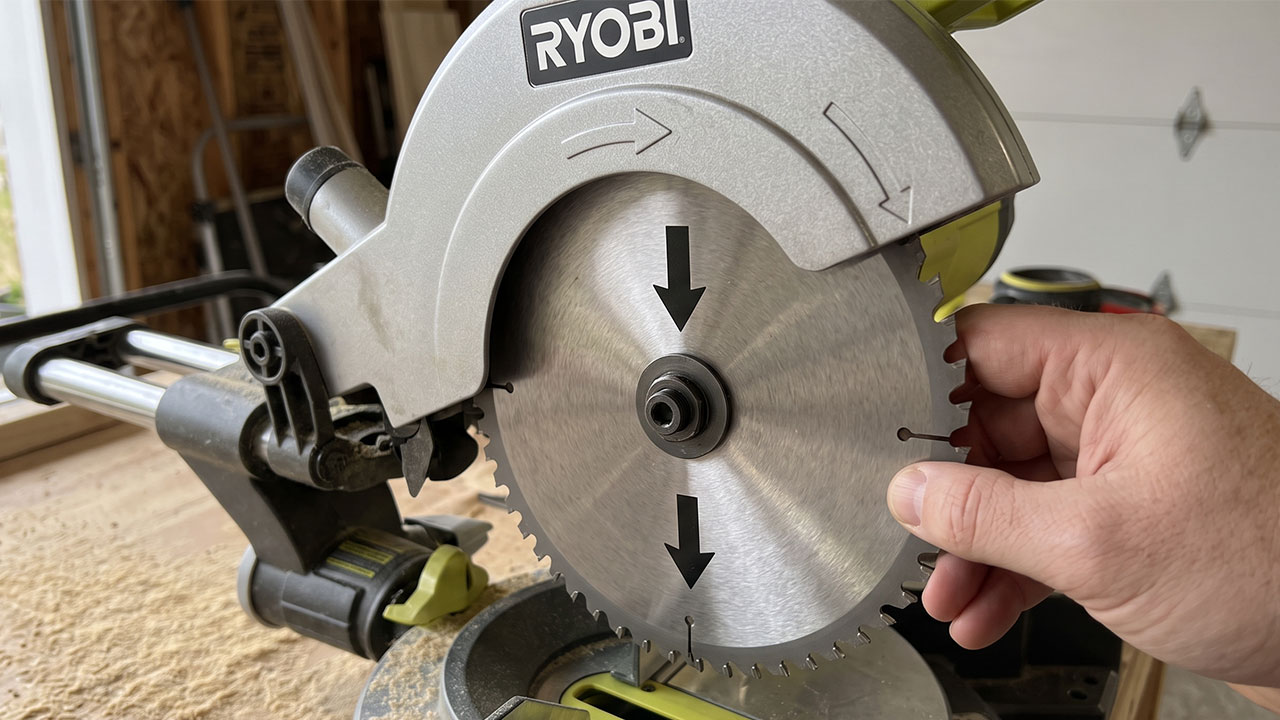
Keep holding the spindle lock button as you back the bolt all the way out. Once the bolt is out, remove the heavy metal washer. This is called the outer flange. Set the bolt and flange in a safe place. Now, carefully wiggle the old blade off the arbor shaft and slide it down and out of the saw.
Step 6: Install the New Blade in the Correct Direction
Putting a blade on backwards is embarrassing, but it happens all the time. Look at the teeth on your new blade. They must point downward at the front of the saw. There is also an arrow painted on the blade. Match that arrow to the directional arrow printed on the metal upper guard of your Ryobi saw.
How to Cut 45-Degree Angles with a Miter Saw
Step 7: Replace the Flange, Bolt, and Guard
Now you just work backward. Slide the new blade onto the arbor. Put the outer flange back on. Thread the arbor bolt in counter-clockwise. Press the spindle lock button again, and tighten the bolt firmly with your wrench. Finally, pivot the blade guard bracket back into place and tighten the holding screw. Spin the blade safely by hand once to make sure nothing rubs.
Mistakes I Made the First Time I Swapped Blades
I thought changing a saw blade would be exactly like changing a drill bit. I was wrong, and I made a few silly errors. Learning from these will save you a headache.
Ignoring the Blade Arbor Size
I once bought a beautiful, expensive finish blade on sale. I got home, took my saw apart, and realized the hole in the center of the blade was too large. Most 10-inch and 12-inch Ryobi saws require a blade with a 5/8-inch arbor hole. Always check your saw’s manual before buying a new blade. If you buy a blade with a 1-inch arbor hole, it will not fit without an adapter ring.
Losing the Small Washers
The little outer flange loves to roll off the workbench and hide in deep piles of sawdust. I spent an hour searching for one once. Keep a magnetic hardware tray nearby when doing tool maintenance.
| Saw Part | What It Does | Placement |
| Inner Flange | Backs the blade against the motor shaft. | Behind the blade (usually stays on). |
| Outer Flange | Clamps the blade tight. | In front of the blade. |
| Arbor Bolt | Locks everything together. | Threads through the outer flange. |
Troubleshooting Common Blade Change Issues
Sometimes things do not go smoothly. If your saw is old, heavily used, or packed with sawdust, you might run into a few roadblocks.
The Arbor Bolt Won’t Budge
Factory bolts are often tightened by powerful machines. If your bolt is stuck, do not panic. Double-check that you are turning it clockwise. If you are, use a longer wrench or slide a metal pipe over your hex wrench to create more leverage. Sometimes a light tap on the end of the wrench with a rubber mallet is enough to break the factory seal.
The Blade Wobbles After Installation
A wobbly blade is incredibly dangerous and will ruin your wood. Do not turn the saw on if it feels loose.
| Symptom | Cause | Solution |
| Blade wiggles side to side | Outer flange is backwards | Flip the metal flange washer around. |
| Blade feels loose on shaft | Wrong arbor size | Ensure you bought a 5/8-inch arbor blade. |
| Grinding noise when spinning | Guard bracket not secure | Re-tighten the guard plate screw. |
How Often Should You Really Replace Miter Saw Blades?
Blades do not last forever. Even the high-end premium blades eventually lose their edge. However, you might not need to buy a new one as often as you think.
Cleaning vs. Replacing
Sometimes your blade is not dull at all. It is just incredibly dirty. As you cut, tree sap, glue, and wood pitch build up on the carbide teeth. This dark crust creates friction, making the saw work harder and burn the wood. Before throwing a blade away, take it off and soak it in a specialized blade cleaner or simple household degreaser. Use a nylon brush to scrub the teeth. I clean my blades every few months, and it brings them back to life instantly.
| Blade Care Habit | Long Term Benefit |
| Scrubbing pitch off teeth | Prevents wood burning and reduces motor strain. |
| Keeping blades in dry storage | Prevents rust on the metal core. |
A Few Final Thoughts on Swapping Blades
Learning how to change the blade on your miter saw is a rite of passage for any DIYer. The hardest part is simply remembering the reverse thread on the arbor bolt. Once you get past that, swapping blades becomes second nature. You will start changing blades for specific projects rather than forcing one dull blade to do every job poorly.
My biggest piece of advice is to never rush this process. Always double-check that your battery is out or the plug is pulled. Keep your workstation clean so you do not lose those crucial metal flanges in the sawdust. Treat your saw with respect, keep a sharp blade on it, and your cuts will dramatically improve. Happy building.